Wednesday, November 29, 2023

How to Eliminate Pests in a Fall Greenhouse

It’s November, which means that the last dregs of fall are fading fast. US growers in zones three and four have likely already experienced some freezing temperatures overnight. Wherever you are, temperatures are dropping, which means that garden pests are looking for a place to take shelter and get away from the cold. 


Unfortunately for you, your greenhouse is the perfect place for pests to shack up for the winter!

Regardless of what you do, a greenhouse will inevitably attract pests during the colder months. By definition, a greenhouse is warm, climate-controlled, and usually has a high humidity level relative to the outdoor environment. Don’t fret! There are ways to minimize pest attraction and manage existing infestations.

Get Rid of Dead Plant Matter
Truthfully, the best time to clean a greenhouse for winter is in September or October, but November is a good case of better late than never. Look at your forecast and select the warmest, sunniest day possible (even if those are in increasingly short supply in the northern US) for cleaning. Before you clear out your greenhouse, check any plants that will be overwintered in the greenhouse. Are they looking healthy? 
If you need to prune away unhealthy or dead branches/stems, now is the time to do it.

Once your plants are pruned, move everything outside. You’ll inevitably have some dead plant matter on the ground, and you’ll likely have bits of mold tucked into the dark corners of your greenhouse. Grab a hose and spray it down! After power washing away the obvious plant matter, apply a cleaner to the structure of the greenhouse. Make sure to pay attention to corners and recesses that offer shade - these areas are hotspots for pest breeding and fungus. Windowsills are another area to focus on.

Tip: Check out SaniDate® All Purpose Disinfectant for a reliable all-purpose cleaner. 

After you’ve applied the cleaner, make sure to wait at least 15 minutes to air the greenhouse out before bringing plants back in.

Seal and Secure

During the cleaning process, keep an eye out for noticeable gaps in your greenhouse structure. Simple repairs on a plastic frame can be done with greenhouse repair tape, which will also be labeled as a polyethylene tape. Make sure the tape is UV resistant. 

If the damage is too severe, we recommend talking with professionals to determine your next step. Some greenhouses you can simply replace one wall, while others might require a complete refitting. As common sense implies, sealing up your greenhouse limits the amount of entry points for pests.

Keep Plants Apart
It can be tempting to fill your greenhouse to the brim during the winter months. After all, where else are you going to grow? However, putting too many plants in your greenhouse can lead to more harm than good. Pests can easily move from plant to plant when leaves from two plants overlap. A single pest can multiply rapidly in an overcrowded greenhouse.

Fight Back!
Keeping your greenhouse free of plant matter and sealed up tight does a great job at preventing most winter infestations, but insects are called pests for a reason. They have a nasty habit of showing up exactly where you don’t want them. When pests do breach your first line of defense, make sure you’re equipped to fight back. Aphids are a pest no matter what time of the year, and they’re more than happy to invade your warm greenhouse.

Sticky Traps are a greenhouse essential when it comes to monitoring pest populations. However, to keep pests like aphids under control, check out biological pest control, such as the green lacewing. Keep in mind that green lacewings are most effective in a setting with temperatures between 67-90 degrees F and relative humidity of at least 30%. Check out this article for more information about maintaining a green lacewing population and using them as a means of pest control.

From Robin @ARBICO Organics

Wednesday, November 8, 2023

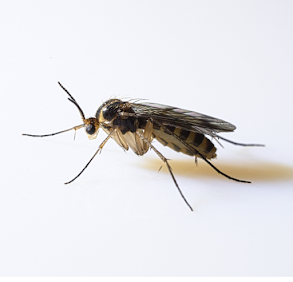
How to Eliminate Fungus Gnats

Gardeners across America are gearing up for the winter growing season in their greenhouses or scrambling to bring their potted plants indoors before the first frost hits. 


Unfortunately for these gardeners, the winter season also means that fungus gnats are ready to throw a baby shower. They’re using your plants as the venue, and they’re not going to stop with just one baby shower. Like most pests, fungus gnats breed quickly and can devastate your garden if left unchecked. 

So how do you deal with fungus gnats?

KNOW SOME FACTS: Fungus gnats have a reputation as winter pests, but they don’t exclusively operate in the winter. They’re active year-round, but fungus gnats have unusually high tolerance to cold for an insect. Some species even have antifreeze proteins, which allows the bug to stay alive and somewhat active throughout the winter, instead of remaining in an egg like other insect pests.

Thankfully, despite the fungus gnat’s high cold tolerance, fully mature members are not all that threatening. In fact, they’re largely passive. Adult fungus gnats are poor fliers. What limited flight they have is more analogous to extended, meandering hopping rather than the precise flight exhibited by a housefly. The adults cannot eat any part of your plant. In fact, adult fungus gnats cannot eat any solid food. They live out their 10-day lifespans on a liquid-only diet of water and plant nectar (if they can easily access it.)

However, adult female fungus gnats can lay over 300 eggs during their brief lifespan. And while the adults are nuisances, the larvae are actual pests to your plants. Fungus gnat larvae will eat through plant roots and leave plants highly susceptible to root rot. With their rapid breeding cycles, fungus gnats can quickly overrun a greenhouse if you aren’t paying attention.

TRY THESE 3 STEPS TO FUNGUS GNAT CONTROL:

1) AVOID CONDITIONS FUNGUS GNATS LOVE  

Soggy, overwatered soil is a fungus gnat’s favorite place to start a family. Eggs and larvae like to hang out in the first couple of inches of soil, so make sure that your topsoil stays dry between watering. To keep topsoil dry, try watering at the root of the plants. While you can go all out and use a drip irrigation system if you have a large grow operation, there are ways to water generic potted plants at the root. Check your pot. Does it have any holes in it along the bottom? If it does, place the pot in a large container. Water the container itself and watch as the water is sucked up through the holes in the bottom of your pot.

 2) ELIMINATE EGGS AND LARVAE 

You don’t want to search for eggs and larvae manually. These things are tiny and often buried under an inch of topsoil. Instead, track your pest control efforts by monitoring the adult population (more on this in the next section). Of course, it’s not unusual to see a fungus gnat eggs and larvae, though both are near microscopic. Eggs are tiny white dots while larvae have black heads, white-to-translucent bodies, and are about ¼ inch long when fully grown. If you see one, just know that many more are likely just below the initial topsoil layer.

To control egg and larvae populations, use a spray, such as the BONIDE® Captain Jack's™ Neem Max or maintain a population of fungus gnat predators in your soil, such as beneficial nematodes.


3) ELIMINATE MATURE POPULATIONS TO PREVENT FUTURE ONES

Since adult fungus gnats aren’t a threat beyond their egg laying capabilities, using normal fly/sticky paper is sufficient to control populations. Fungus gnats are very weak fliers, so making minimal contact with the adhesive is enough to immobilize the adult. Make sure you get yellow sticky paper—this color attracts the most fungus gnats. A bonus of using fly paper is that you can monitor adult population levels over time. 

Once new adults stop getting stuck to the fly paper, you’re on the path towards wiping out your unwanted winter gardening guests.


By: Robin @ ARBICO Organics 

Tuesday, October 17, 2023

Meet Goliath, the World’s Largest Beetle

Goliath Beetle

You’ve dealt with whiteflies, gnats, flies, aphids, and so much more in your backyard garden, but there are some insects out there that can be truly horrifying. Meet the Goliath beetle! This insect is a standout in the world of insects, and not just because of its massive size. It’s well known for being the largest beetle in the world, but Goliath beetles deserve to be recognized for more than their size.

Fun Fact: Goliath beetles are a group of five beetles, making them a small portion of the 35,000 scarabs and beetles alive today. 

  • Goliathus goliatus is the most well-known of all the Goliath beetles, but all of them share vivid coloration and impressive size that are the hallmarks of this species. 
  • The largest beetles can grow up to 4.3 inches in length, and their colors range from generic blacks, browns, and grays to vibrant shades of green, blue, or red.

Fun Fact: From birth to death, Goliath beetles go through a complete metamorphosis. 


Goliath v. Others
This process consists of four stages: egg, larva, pupa, then adult. After emerging from an egg, Goliath beetle larvae grow to the size of an adult human palm. Goliath beetle larvae are well known for their immense appetite, primarily feeding on decaying wood and plant matter. Their diet, rich in cellulose, is broken down by specialized gut bacteria, allowing the larvae to thrive in their nutrient-rich environment. These larvae can take several years to reach full maturity, and during this time, they undergo multiple molts, shedding their exoskeletons as they grow. 

Fun Fact: Once fully grown, a Goliath beetle can lift up to 850 times their body weight!

Due to their incredible size and beauty, Goliath beetles have become popular in the exotic pet trade and insect collecting hobby. Habitat destruction and agriculture combined with the pet trade, have put pressure on their populations in the wild, and most species are now considered vulnerable or endangered. Conservation efforts are being made to protect their natural habitats in Africa and regulate the trade of these magnificent creatures.

The next time you’re complaining about whiteflies and aphids, keep things in perspective and be thankful that you don’t have to do pest control on beetles the size of your hand!

Monday, September 25, 2023

How to Prepare Your Greenhouse for the Winter Growing Season


September is upon us. Kids are back in school, football is being played on the weekends, and veteran gardeners are starting to prepare their greenhouses for the winter growing season. If you live in a gardening zone where temperatures drop below freezing and snow frequently falls, a greenhouse or a cold frame is your only option for growing during the winter.

If you use your greenhouse year-round, the first thing on your to-do list is preparatory cleaning.

Your home might undergo spring cleaning every year, but for your greenhouse, the most critical time to clean is before winter. If your greenhouse does not stay empty during the summer, the growing season has finished, so there are less plants to worry about. Cleaning is critical to eliminating any pests, such as slugs, whiteflies, and gnats, while also eliminating diseases. Once temperatures start to drop outside, your greenhouse becomes a sanctuary for pests to lay eggs and overwinter. Standing water and clumps of old soil make great nurseries for nefarious insects.

Curious about cleaning your greenhouse? We have a detailed guide here, but here’s a quick outline.

  1. Remove everything (plants, tools, shelving, etc.) from the greenhouse. You need to give yourself some space to work!
  2. Select a cleaner that is designed for use in a greenhouse. Standard, off-the-shelf cleaners may contain harsh chemicals that can linger and inhibit future growth (even when you remove all of your plants from the greenhouse before cleaning).
    1. Looking for a recommendation? Try ARBICO’s ZeroTol® HC. This spray acts as a standard disinfectant that can be applied to greenhouse surfaces, but it also can be applied on plants themselves.
  3. Hose it down! Don’t worry about applying the cleaner you selected in the previous step yet. Instead, take a hose and use a jet nozzle to spray down the greenhouse frame. If you don’t have a jet nozzle, you can use a broom to a similar effect, though it’s much less fun.
  4. Use your selected cleaning solution to clean the structure of the greenhouse. Make sure that it sits for at least 10 minutes. While cleaning, keep an eye out for holes in the structure or areas that need additional insulation.
  5. Check your windows! A mild soap and water solution works fine for this, and a squeegee can speed up the process. Clean windows let in more light, so if you neglect window cleaning year after year, your plants will get a diminishing amount of light.
    1. Make sure you open all of your windows and scrape out the grooves. Pests and mold love to propagate here, so it’s important to stay on top of things.
  6. Let the greenhouse dry completely before moving any plants back inside.


After you’ve finished your cleaning, decide if you are propagating any plants. 

Propagation allows your best crops to be grown over and over, and it is less expensive than buying new seeds. If you are propagating, prepare the necessary cuttings. We won’t get into too much detail about propagation in this article, but if you are looking to try a new rooting hormone, take a look at Bontone II Rooting Powder. Regardless of if you choose to propagate or if you decide to grow new plants, you should prepare fresh soil for the winter. This is another step to ensure that you aren’t carrying any summer pests through the winter growing season. During your cleaning, you should have removed dead plants, branches, and miscellaneous debris from both the greenhouse and your growing medium. Some growers even transplant growing plants to ensure that their winter greenhouse is 100% free of pests! When placing fresh soil into your pots or trays, make sure that the soil contains the necessary micronutrients and beneficial fungi. Keeping a healthy amount of mycorrhizae in the soil is crucial for developing healthy roots (for both propagated cuttings and plants grown from seeds). Since greenhouses are cut off from the natural soil balance found in a backyard garden, you need to add your own mycorrhizae. The Root Build 240 adds a blend of mycorrhizae that are beneficial to over 90% of all plants, including winter greenhouse staples such as lettuce, tomatoes, and onions.

Growing in the winter isn’t too much different from growing at any other time of year in a greenhouse. What’s critical about the winter season is that it gives you time to reset your growing environment. When you properly prepare for the winter growing season, you ensure that last year's whiteflies and fungi don’t become next spring’s problem.

By: Robin @ ARBICO Organics

Tuesday, August 29, 2023

How Sticky Traps Help Prevent Pest Infestations


The trickiest part of pest control is understanding if your techniques are actually keeping pests out of your garden or greenhouse. If you’re using an organic type of pest control such as nematodes, how do you know if the nematodes are working or if any pests were taken care of long ago?


Sticky traps, also known as fly paper, are a great way to gauge and monitor insects in your growing environment. It’s important to note upfront that if you only put-up sticky traps, you will still have pest problems. While any adult insects that get stuck to the paper are removed from the breeding cycle, sticky traps can’t eliminate an insect infestation. However, they are excellent tools for monitoring the population of invasive pests. Using sticky traps before the onset of an infestation can help you identify what pest issues you are dealing with. If you can’t identify the pest, you can contact your county extension office or a company like ARBICO Organics to help you identify the pest. If you notice that more insects are getting stuck to the paper, that’s a good time to deploy more aggressive pest control techniques, such as using insecticide or releasing beneficial insects such as green lacewings into your grow area.

ARBICO Organics has two types of sticky traps: yellow sticky traps and blue sticky traps

The color is the distinguishing difference for these products. 
Both traps use mess-free, double-sided adhesive for
 easy application to a variety of surfaces, and both 
traps are 5×7 inches. They’re even priced the same! 
The adhesive used in both traps is non-toxic; however,
 it will stick to skin, hair, and fur if a child or pet gets into it. 
Use soap and water or baby oil to remove the paper.

So why are ARBICO’s sticky traps offered in two different colors? It’s not about making a fashion statement. Instead, different colors attract different types of pests. Yellow paper will attract aphids, gnats, whiteflies, and more. Blue paper is especially effective at attracting thrips and leafminers. If you’re looking for a paper for general pest monitoring, we recommend the yellow paper. Yellow coloration is a safe bet for attracting a broad spectrum of insects, and most insects are more easily countable on yellow paper.

Sticky traps are often the first warning sign of an infestation in your garden or greenhouse. Keeping track of how long it takes for a sheet to fill up can give you valuable information about when bugs are at their peak, when a population of a certain pest is rapidly growing, and when your pest control efforts have eliminated an insect population. The earlier you notice an infestation, the better your chances of eliminating it are so put up some fly paper today!

Thursday, August 17, 2023

How to Overcome Late Summer Lawn Problems

You’ve likely heard various news stories about how summer 2023 has been one of the hottest summers on record for the USA. But it hasn’t just been in America. 


Across the world, July 2023 has been the hottest month on record. Focusing back on America, the American West has been experiencing water shortages due to heat and drought, and the traditional American lawn has turned into a big green punching bag for select environmental activist groups. 


Because of this, many homeowners find themselves in the awkward position of caring about their lawn while still being conscious of the environment. By looking at the use and distribution of water, pesticides, and fertilizers in your lawn, it’s possible to keep a healthy and sustainable lawn as the summer comes to an end.


Watering Your Lawn

The easiest (and most obvious) way to reduce your lawn’s water intake is to stop overwatering. Just like how overwatering is the leading cause of houseplant death, overwatering your lawn can lead to yellowing lawns and dead grass. This issue is exacerbated because when you overwater a lawn, the water waste is much more significant than the water that is wasted when you have a heavy hand on your watering can. The EPA estimates that during the summer, 50% of the water homeowners use outdoors is wasted because of overwatering. The average American family uses over 300 gallons of water per day, and 30% of this water is used outdoors, though this number fluctuates based on what region you live in.

Are you worried about overwatering? Use these points as a checklist of common symptoms of overwatering.

1. Runoff. Yes, this is a rather obvious clue, but if you see water splashing down a hill or trickling onto your sidewalk, you’ve oversaturated the soil. Using additional water at this point would be both wasteful and detrimental.

2. Yellowing or browning grass. “Wait! Isn’t yellow grass a sign that your lawn is underwatered?” If you thought that, don’t worry, you’re correct. However, it also applies to overwatered grass. The way to tell is to take off your shoes and walk on your lawn. How does the grass and soil feel on your feet? If the soil is crumbly or crunchy and the grass feels brittle, it is underwatered. If you feel like you’re stepping on a sponge, your lawn is severely overwatered.

3. There are noticeable amounts of fungi and bugs. 
All lawns are going to have bugs crawling through them, but if you’re noticing unusually high concentrations, this should be interpreted as a sign of overwatering. If you notice clumps of mushrooms close together, that is also a sign of overwatering.

So, when does your lawn actually need water? And how should you water your lawn to avoid overwatering?

1. Check for curling at the tips of grass blades. If the tip is curling inwards onto itself, water your lawn immediately. The grass will bounce back and be just fine, but a failure to water at this point will eventually damage your lawn.

2. The grass doesn’t spring up after being stepped on. If you walk across your lawn, look back, and can clearly see your footprints, the grass is dehydrated. Again, immediately watering your lawn can fix this, but the longer you wait, the higher the chance of permanent damage.

3. Water in the early morning. Turn on those sprinklers between 5 and 9 AM. Watering your lawn in the afternoon when it’s hottest doesn’t keep your lawn cool. Instead, the water will evaporate before it can be absorbed by the root system. Do not water during the evening, as this can cause fungal infestations.

4. Think about investing in a rain sensor. Rain sensors (also called rain shutoff devices) can control and override your sprinkler system when certain rainfall conditions have been met. One of the most common causes of water waste is when a sprinkler system is set to a timer and automatically activates after recent rainfall.

Pesticide Use

Healthy lawns still attract bugs, and there are certain types of pests that we want nowhere near our lawns and homes. However, spraying standard, off-the shelf pesticides can cause chemical damage to your lawn. Sure, you’ve taken out the bugs, but you’re left with an ugly yellow scar. Use natural, organic pesticides that repel and control pest populations without stressing your lawn. Here are three recommendations from ARBICO Organics. All suggestions assume that you have an effective way to apply pesticides and/or fertilizers to your lawn, such as a push-along spreader or a handheld sprayer.

1. Garlic Barrier. The natural garlic spray will be absorbed into your 
lawn approximately 30 minutes after application. Don’t worry about 
the smell! That’s absorbed too. At the time of application, 
concentrated garlic damages the skin of many common insect
 pests, which shortly results in their death. After the application, 
the garlic absorbed by your lawn will continue to repel insects 
for up to 2 weeks.

2. Mosquito Magician. Nobody likes mosquitoes. 
Get rid of both larvae and adults by applying Mosquito Magician 
to your lawn. A natural mixture of citronella, cedar, 
lemongrass, garlic, geraniol, and rosemary oils come 
together to rid your lawn of nature’s infamous bloodsuckers.

3. Essentria G. Composed of essential oils like clove, thyme, and wintergreen, this insecticide was designed for application on 
schoolyards and government facilities. It repels nuisance
insects while being safe for children to play in.

Fertilizer Use

You never want to apply synthetic or chemical fertilizers to your lawn in the summer—the risk of burning your lawn is too high. Once August rolls around and the weather (finally) starts to cool, there’s only one more window where you can apply fertilizer to your lawn. You’ll want to apply your final batch of fertilizer in the late September to early October range. Ideally, you want to apply your final batch of fertilizer about 60 days before the first freeze. This fertilizer application is to help your lawn get greener faster in the spring. Look for a slow-release nitrogen fertilizer to tide your lawn through the winter. Before applying fertilizer in the fall, try doing a pH test on your lawn. If the soil is too basic or acidic, hold off on applying fertilizer, as it won’t be absorbed into the soil and will instead encourage weed growth. Winter will act as a reset for your lawn, and while it won’t be as green in spring as it would have been with proper fertilizing, you also won’t have to worry about an infestation of weeds.


For more information on lawn care visit ARBICO's dedicated lawn care page here


Thursday, August 10, 2023

The Five Steps to Aphid Control

Aphids, also known under their family name Aphididae, are a slow moving pest found in different shades of green, red, brown, black and yellow. They can be spotted by their pear-shaped, oblong bodies and are identifiable by the two tubes (called chronicles) projecting from their rear. You may have seen these little pests around your garden before. Not to worry! Common to gardens big and small, Aphids are a familiar insect across US and Canada due to their diversity in species variety and their rate of reproduction. Attributable to their prevalence, there have been many products developed, solutions made, and preventions discovered. These pests are best treated early and diligently—the five steps to aphid control are to trap and monitor, use repellent sprays, implement general predators, find a great knockdown spray, and to make use of aphid parasites.


Trap & Monitor

Aphid attacks take form in a variety of ways and results from these invasions can range from having no response at all to plants having curled or swollen leaves. Symptoms of aphid damage can include decreased growth rates, mottled leaves, browning, wilting, low yields and death. One way to take control of your aphid predicament is to trap and monitor. Sticky traps can be a great way to keep an eye on your crop and catch any early signs of aphid infestation. These traps use a color spectrum to attract pests and prevent further damage by giving you a sense of the severity of the problem at hand. Sticky traps work best for outdoor gardens and potted plants. Ribbon Traps are ideal for row crops and greenhouses. With their vibrant yellow color, this method attracts aphids to the brightness of its sticky surface to trap and monitor the pests.


Repellent Sprays

Although aphids can cause minimal damage, these pests have the potential to transmit bacterial and viral diseases. If such a condition is spread, this can be much more of a challenge to control than the actual aphids themselves. Any of these methods listed above and below will work to combat your aphid problem, including repellant sprays. Check out Garlic Barrier spray to get  broad spectrum action with minimal contact effects. This spray can be best used in a variety of gardens from commercial to residential, and can be used safely around people, pets, animals and fish. Aphids won’t care much for the sulfurs absorbed from the garlic if you use this spray!


General Predators

Another problem caused by aphids is the sticky substance they leave around stems and leaves. This “honeydew” is a sugary liquid that is produced by aphids as waste. It can attract other insects like ants that will eat the honeydew, causing more issues for your garden. Yet another reason to find a solution for your aphid issues! The third way to limit aphid population growth is to use general predators. Green Lacewings are a great way to control soft bodied insects including aphids. These helpful creatures are ideal for lowering aphid populations! In addition, both Assassin Bugs and Minute Pirate Bugs are two more effective forms of general predator bugs that will assist in curbing population growth of these pernicious pests.


Knockdown Sprays

Not only can the “honeydew” that these aphids produce cause problems in itself, but sometimes this sticky substance can encourage fungal diseases such as powdery mildew and Black Sooty Mold. An additional way to control aphids and prevent such fungal diseases is through the use of knockdown sprays. Before a significant amount of aphids are spotted, Insecticidal Soap sprays can efficiently minimize effects on beneficial insects while keeping your aphid populations contained. Using neem oil is another method to rid of these pests. However, there is a bigger risk to beneficials, unlike the insecticidal soap mentioned previously. BotaniGard® 22WP is yet another useful way to regulate your aphid issues through the use of Beauveria bassiana, which spreads a disease by the name of White Muscardine to kill these pests.


Aphid Parasites

Effective releases of general predators are a helpful way to limit aphid populations. However, if you are looking to control a more severe infestation, use aphid parasites. By using parasites to specifically target your aphid problems, your efforts overall will be more effective!  Aphid parasites include Aphidius colemani, Aphelinus abdominalis, Aphidius ervi, and Aphidoletes aphidimyza.


Although aphids are a widespread challenge for gardeners, commercial growers and greenhouses, these pests can be quite detrimental to one’s garden if not under control before reproduction starts. Thankfully, there are many solutions and methods of prevention due to their prevalence and abundance across gardens in North America. Many of these solutions can be found on ARBICO’s dedicated aphid webpage. By following the five steps to aphid control, your garden should be abundant in no time!

By: Kyra @ ARBICO Organics 

Wednesday, July 26, 2023

How to Protect Your Ornamental Plants from Disease and Pests


It’s summer in America, which means that many ornamentals are in full, vibrant bloom. Ornamentals cover a wide range of plants. The only qualification for being an ornamental is that the plant is not grown for consumption. This means that everything from petunias to non-fruit trees are considered ornamental plants. When you have such a wide range of plants, it’s difficult to give general gardening advice about ornamentals. A cactus requires vastly different care than a begonia. Regardless of what type of ornamental you’re growing, all plants deal with pests and disease at some point. Keeping on top of pest issues, maintaining a healthy growing environment, and developing repeatable regimens go a long way towards keeping your garden colorful this summer.

The foundation of pest and disease control is that you need to stop it before it happens. Benjamin Franklin said it best, “An ounce of prevention is worth a pound of cure.” However, it’s currently the middle of summer and past the time when you’re putting plants in the ground for an outdoor garden. While some species of plants naturally repel harmful insects and others are naturally hardy and disease resistant, there are steps you can take to make sure your fragile ornamental plants still flourish.

General Tips for Pest Control

Pests don’t just mean bugs. Rabbits, deer, and a variety of other mammals can mutilate a well-kept garden in a manner of minutes. Additionally, not all bugs are bad. Bees and butterflies are pollinators and are obvious examples of helpful insects, but other species of insects keep your garden safe by hunting harmful insects. Green lacewings are a great example of a beneficial insect that choosing to hunt and prey on aphids.

ARBICO’s Solution for General Insect Pests

If you’re seeing harmful insects in your garden, try BotaniGard® MAXX. This organic insecticide can be sprayed onto plants and pests when a pest population first becomes noticeable. It’s designed to be an all-purpose tool for pest management, taking care of weevils, whiteflies, aphids, and more.

ARBICO’s Solution for Mammal Control

A variety of simple, organic sprays are available that repel animals through smell and/or taste aversion. Check out the Bobbex-R™ Animal Repellent and the BONIDE® Hot Pepper Wax Animal Repellent RTU! Both sprays can be applied to plants without fear of chemical burns. As a bonus, you can apply the sprays to fencing around your garden to further ward off curious critters.
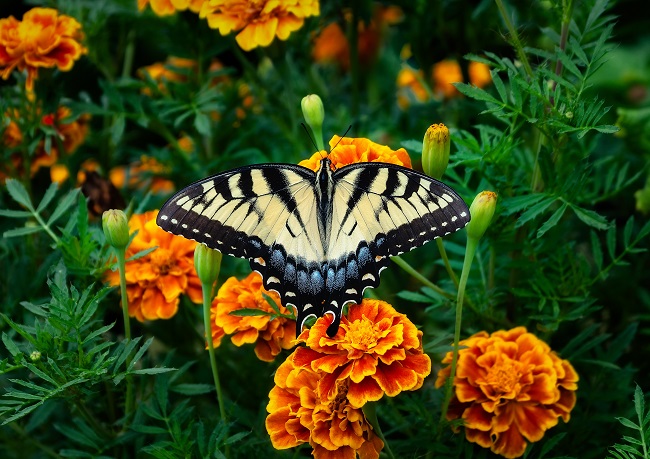
Marigolds are pollinator friendly ornamental plants that are naturally resistant to deer and rabbits.

Tips for Next Year

Try planting some pest-repellent plants in your garden. Zinnias and marigolds are beautiful ornamentals that are hated by deer and rabbits.

Keep your Ornamentals Healthy with Basic Disease Management

A pest infestation can be curtailed if you catch it early enough, but once a plant disease spreads through your garden, it’s largely up to chance if your plants survive. Keeping a healthy garden requires foresight and a good eye for high-risk areas. Here are 5 simple steps for keeping your ornamentals healthy this summer.

1. Mulch your garden! The best time is in spring, but mulch can be spread anytime, and you’ll still get positive benefits. Mulch retains soil moisture and can help prevent overwatering.

2. Water in the morning, and never overwater. If you see stagnant pools of water in your garden, you could be in trouble.

3. When using fertilizers, minimize the amount of nitrogen you’re applying to the plant. While nitrogen does help your plants grow, it can also cause fungal and bacterial infestations if applied in abundance.

4. Give your plants some space! If your plants are crowded together, humidity will increase in that localized area, which increases the possibility of infection.

5. Keep up on your pest control! If aphids are eating your leaves, the holes left behind are especially vulnerable to infection.

ARBICO’s Solution

Arber® Bio Protectant contains giant knotweed extract. When applied to your plants, it creates a barrier that inhibits fungal and bacterial growth.

Tips for Next Year

Make sure your garden is tilled and all previous weeds, discarded leaves, and plant debris are gone from the grow site. Diseases can remain dormant on dead plant life throughout the winter.

How to Eliminate Japanese Beetles From your Ornamentals

Japanese beetles aren’t only found in Japan. They’ve long since crossed the Pacific Ocean and have found America to their liking. They’re found across the USA and will settle anywhere with sufficient foliage, which may include your garden. These beetles aren’t picky. They’ll eat everything from leaves to stems to flowers, and they do travel in groups. If you find one beetle with the distinctive green and copper coloring, you will find many more. Two easy solutions exist to control a small beetle population: soap and water or manual removal. Spraying the beetles with soap and water will cause them to lose their grip and then fall to the soil. Japanese beetles do not bite or have any irritants, so putting on a pair of gardening gloves and picking them off your plants will get rid of a small population.

ARBICO’s Solution

Beneficial nematodes can eliminate Japanese beetle larva before they get the chance to mature. BotaniGard® MAXX, mentioned earlier in this article, also works to kill off adult Japanese beetles. Go to ARBICO’s dedicated webpage for a list of all products that can keep a Japanese beetle population under control.

Manage Potential Mildew Buildup

You’ll notice mildew by the white, powdery coating it leaves on the stem and leaves of plants. Managing mildew follows the same general principles outlined in the previous section on basic disease management. Below is a quick list that you can reference. Remember, preventative measures are key. If mildew establishes itself on one of your plants, prune away the infected area immediately, then properly dispose of the infected stems and leaves to avoid re-contamination burn the infected stems and leaves.
1. Make sure that your plants have some level of sun exposure every day. Shadier, enclosed locations are an ideal breeding ground for mildew.

2. Water early, and water to the roots. Splashing water onto leaves increases the risk of mildew. Installing a drip irrigation system can be a way to save water, save time, and prevent mildew from forming.

3. Keep plants separate. Too much crowding equals too much humidity, which can easily lead to mildew.

ARBICO’s Solution

SuffOil-X® can be applied over plants to control a variety of fungal diseases, such as Botrytis and mildew.

Friday, July 14, 2023

Environmentally Safe Solar Fly Trap Eliminates Flies


Flies are everywhere. They carry diseases (of plant, livestock, and sometimes human varieties), pester livestock, and they buzz constantly! Fly trapping is an important step to keeping an insect population under control. You’ve likely seen fly paper hanging from the ceiling, and when dealing with a large fly population, fly paper quickly gets filled and becomes ineffective. When you’re waging war against the flies, the best solution is to bring in the heavy artillery.

Like fly paper, the ARBICO Organics Solar Fly Trap is a passive method of fly control. Unlike fly paper, which traps flies by keeping them stuck to the paper, a solar fly trap uses sunlight to fry the flies once they enter the trap.

We’ll provide a step-by-step breakdown of how a solar fly trap works, but sometimes it’s easiest to see it in action. Watch this minute long video to see how the ARBICO Organics Solar Fly Trap operates.

How does a solar fly trap work?

1. The fly trap is a metal cylinder with an inverted funnel on the bottom. This funnel allows flies to enter the trap but prevents them from leaving.

2. Prepare the fly bait. If you’re purchasing the ARBICO Organics Solar Fly Trap, the trap comes with powdered bait. Simply mix the bait with water (a gallon jug or bucket works nicely for this) then loosely cover and wait seven days for the bait to ferment. Looking to make your own bait? See the next section for a simple recipe.

3. Once the bait has fermented, pour it into the suspended bait bowl at the bottom of the trap.

4. Flies are lured into the trap by the bait but move past it when trying to reach it. At this point, the flies are trapped in the metal cylinder and will be fried by the sun.

5. The solar fly trap is also reusable, so you can use it repeatedly. You can easily remove the lid, empty the trap, clean it with a hose and it’s ready to go.

Making your own fly bait

1. Fill a gallon jug halfway full of warm water.

2. Add one cup of baking yeast to the water.

3. Add a pinch of sugar to the mixture to make it even more appealing to flies.

4. Loosely cover the gallon jug to prevent gas build up. Store in a well-ventilated area.

5. After one week passes, your bait should be good to go!

What do I do with all these dead flies?


Even if your greenhouse or garden doesn’t have the insect problems that a livestock barn does, it can still be worth it to invest in a solar fly trap. After a day or two, you’ll see a shocking number of dead flies in your trap. A savvy gardener will take these dead flies (they’ll slide right out of the trap when it is tipped) and use them as fertilizer for a garden. While there isn’t any data to reveal the exact nutrient value of flies, many gardeners utilize dead flies as fertilizer. Just dig around the roots of your plants until you’ve created a trench. Spread a thin layer of dead flies, then bury the dead flies under the topsoil. If you’d like to save a little time and effort, you can just add the dead flies to your compost pile, providing that the insects are free of mold or other contaminates. The flies will be broken down by microorganisms in the soil and will organically replenish nitrogen levels. Since flies are so common, every time you set out your solar fly trap, you get a free batch of fertilizer!

The trap is made in the USA from lightweight, rust-free, heavy-duty aluminum. It is lightweight and may need to be mounted to a board or secured to the ground with rocks or blocks to prevent it from blowing away during a strong wind. Mounting the trap is easy, as the legs of the trap come with pre-made holes for mounting. This also helps if you are a horse owner who has a curious horse that may try to knock the trap over!

Fly trapping is only one part of a proper pest control plan. Stopping flies before they mature is another crucial step to keeping the insect population under control. For more information on how to target fly pupae, click here or go directly to Arbico-Organics.com to see ARBICO’s full lineup of pest control products.


Wednesday, June 28, 2023

Organic Weed Control Eliminates Weeds and is Kind to the Environment

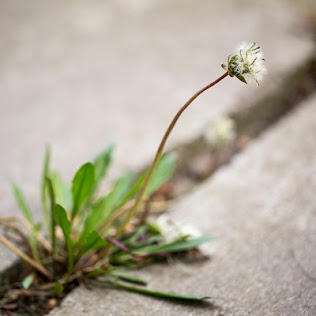
Weed control is a tricky thing to get right. By their nature, weeds pop up where you don’t want them. In fact, the definition of a weed requires that the plant in question must be growing where it is not desired. If the plant is growing in a desired location, it can no longer be considered a weed, even if it is a species of plant that is considered invasive, such as wild violets or dandelions.

While you can certainly go to your local hardware store, head into their garden section, and pick up a big jug of name brand weed killer, many gardeners take the approach that gardening is not simply about eradicating weeds. Instead, the most important approach is be sustainable and do no harm to the environment. Using commercial weed killers composed of harsh chemicals violates this principle, so many environmentally conscious gardeners have turned to organic methods of weed control.

Just because you’ve chosen to stay away from commercial, chemical-intensive herbicides doesn’t mean that you’re waving the white flag and letting weeds overrun your garden or investing countless hours manually pulling up weeds by the root. Many methods of organic weed control are just as effective as chemical sprays, and some methods require only household items. Generally speaking, weed control falls into three stages: Pre-Emergent, Barrier, and Post-Emergent.

Pre-Emergent Care 

Oftentimes the best way to take care of a weed infestation is to prevent it from ever occurring. Once a weed takes root, you not only have to find a way to kill it, but you also need to understand that it can scatter seeds that will emerge next year. But we get it. Preventing weeds from entering your garden is easier said than done. Even with proper diligence, weeds will inevitably find their way into your garden. Don’t fret! There are still measures you can take to prevent weeds from overwhelming a garden.

When taking pre-emergent measures, think about what weeds need to take root and grow. They need 
suitable conditions to root and grow, just like the plants you want to nurture. After establishing your plants at the start of your growing season then verifying that they’ve taken root, turn your attention to ensuring that competing weeds never get the conditions they need to thrive.

Corn gluten is an effective and organic form of pre-emergent weed control.
Corn gluten is an effective and organic form
 of pre-emergent weed control. 
Corn gluten is an example of a substance used in pre-emergent weed control. When applied to topsoil, it prevents plants from forming roots after they germinate while not affecting plants with established root systems. Since the weed cannot establish a root system, any shoots will quickly wither and die. However, corn gluten is not a simple, catch-all method of weed control. Timing is critical when applying corn gluten. The soil needs to remain dry after the corn gluten is applied, and corn gluten can also impede the growth of your desired plants if it is applied too early. Corn gluten is available in liquid and granular forms. There’s no need to worry about dangerous chemicals when spreading corn gluten! It’s commonly used in pig feed and is digestible by both humans and common household pets, although it doesn’t taste particularly appetizing.

Focusing your watering also prevents weed growth. Using a sprinkler system spreads water across an entire surface area. Not only is this inefficient, but you’re also making uninhabited soil a perfect place for weed growth. A simple solution would be to manually water your plants using a watering can, but this can quickly become time consuming. We recommend investigating drip irrigation systems to see if this method of water distribution is right for you. Drip irrigation is delivered through underground piping directly into the roots of plants. Not only is this the most efficient way to water plants, but it also has one of the lowest water costs. By only delivering water to plant roots, you prevent weeds from taking over soil frequently moistened by a sprinkler system.

Biodegradable garden paper helps prevent dormant seeds from taking root and helps kill off
established weeds.
Establishing Barriers

Barriers can be classified as both a means of pre-emergent and post-emergent weed control. By depriving a patch of soil of sunlight, you will prevent any dormant seeds from taking root and kill off any established plants. When most households in America received a daily paper (or at least the Sunday paper), a common gardening tip was to place sheets of your newspaper on an area with weeds (or an area you wished to keep free of weeds). Wet the newspaper to add weight to it, then add a coat of mulch. Any weeds killed off by this method will be broken down by bacteria in the soil and repurposed into nutrients for your plants. Even though you may no longer get a newspaper, rolls of biodegradable garden paper are affordable and serve the same purpose.

Cover crops can be used to form a green barrier. This green barrier serves the same purpose as a barrier created by newspaper or garden paper. By forming a leafy barrier that blocks out sunlight or by competing for the nutrients in the soil, cover crops can prevent weed growth while simultaneously turning a gardening bed into an explosion of green. We recommend planting various types of clovers, as they are hardy, naturally replenish nitrogen in the soil (clovers are a type of legume) and can display a wide variety of flowers. Looking for recommendations on where to start looking? Yellow sweet clover, crimson clover, and hairy vetch all display vibrant flowers while crowding out unwanted weeds. Read this article for more information on how cover crops can help your garden.


Post-Emergent Management

Even with foresight and effort, weeds are still inevitable. You will encounter weeds in your garden, which means you need to have a plan to combat them. There will always be the classic example of putting on a pair of gloves and yanking out a stubborn nettle by the roots. And if you’ve done a good job of establishing pre-emergent weed control, manually yanking out the stragglers may be the simplest option.

Several effective household items that act as weed killers have been passed through gardening circles for many years. Try one of the following options to see what works best for you, but keep in mind that most sprays and formulations are non-selective and should be applied carefully to avoid contact with other plants. You don’t want to go hog wild spraying everywhere and end up accidentally killing your prized petunias!

Vinegar + Dish Soap: This is the time-tested classic. Most household vinegars have 5% acetic acid, but if you have something stronger, it will be more effective. Some gardeners add salt to this mix, but this is largely unnecessary. The dish soap causes the spray to stick to the weed while breaking down the upper epidermis of the leaf. The acetic acid in vinegar draws out the water and dehydrates the weed. Apply to weeds when 24-48 hours of sunny weather is forecasted. Make sure to note that this mixture often fails to kill the root system, which can result in the weed growing back if it recovers from the shock.

Rubbing Alcohol: Start with one quart of water. Add two tablespoons of rubbing alcohol to the water. Repeat these steps until you have enough weedkiller. This mixture mirrors the vinegar solution discussed above, though rubbing alcohol tends to be more potent than a standard cooking vinegar. If needed, you can even substitute vodka for rubbing alcohol—just make sure you’re using vodka from the bottom shelf!

Organic Herbicides: ARBICO Organics specializes in a wide variety of organic herbicides. The Avenger Weed Killer uses a d-Limonene base derived from citrus oil, to dissolve cuticles and dehydrate the plant down to the root system. If you’re looking for a simple, out-of-the-box solution, check it out.


Wednesday, May 10, 2023

The Dreaded Spotted Lanternfly (Lycorma delicatula)

Spotted Lanternfly adult
These invasive insects were first detected in Pennsylvania in 2014. It is believed that they were stowaways on a shipment of imported stone. Spotted lanternflies (SLF) are exceptional stowaways/hitchhikers, and it is precisely this type of behavior that accounts for their rapid spread to fourteen additional states. At the time of this writing (May 2023), they are found in Connecticut, Delaware, Indiana, Maryland, Massachusetts, Michigan, New Jersey, New York, North Carolina, Ohio, Pennsylvania, Rhode Island, Virginia, and West Virginia. Many experts believe that that number will climb within the next year to include states further south along the coast. By 2050 they are expected to be established all the way to California.                                        
Adult (left) and 4th instar nymphs (right)


Spotted Lanternflies, despite their name, are not flies - they are True Bugs from the order Hemiptera. Hemiptera have sucking mouth parts, called proboscis, which work like straws. They use their proboscis to pierce into plant parts and suck out the sap. Some of the most damaging and challenging to control insects are from this order, like aphids, bed bugs, brown marmorated stink bugs and scale insects.

Spotted Lanternfly infestation on grapes.According to Cornell University, SLF have yet to cause significant damage to agricultural crops. The exception to this is grapes, where they have proven to be a serious problem. SLF are swarm feeders, and they can quickly overrun an orchard with hundreds of individuals in multiple life stages on each vine. This will debilitate the vine, weakening it to the point that it produces poor or no blooms and fruit and loses its winter hardiness. These effects, as well as oozing, wilting and defoliation, can occur on any plant that SLF feed on. Plants are often unable to withstand the swarm and simply die. 

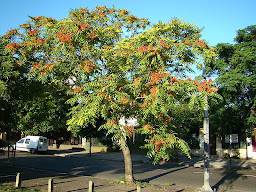
Tree of Heaven (Ailanthus altissima)

Since SLF do not sting or bite, they pose no direct risk to people. However, they do create significant trouble due to the copious amounts of sugary waste (known as honeydew), that they create. Some people report allergic reactions to honeydew, but this is not common. Mostly, it’s an unpleasant nuisance for people. It sticks on outdoor surfaces like porches, cars, benches and on clothing and pets. Honeydew also has an odor like fermentation that is unpleasant to most people but irresistible to many unwanted insects like ants and wasps. Bees are also drawn to it - they like to feed on the honeydew, especially when it is found on a Tree of Heaven (Ailanthus altissima) – the preferred host of SLF and another invasive species. Apparently it creates a uniquely tasty honey for an interesting reason. Read more here.

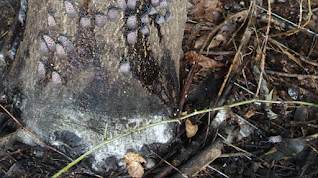
The bottom of tree showing sooty mold, honeydew and other damage caused by Spotted Lanternflies. There are also adults on the tree.
SLF adults and damage to tree

A significant issue with SLF is sooty mold. This fungus uses the honeydew as a grow medium and will quickly spread throughout the affected plant. Sooty mold spores and pieces of mycelia can be easily spread to other plants as well by splashing water or wind. Once there, the mold will exploit any weakness it finds to establish a foothold. More on sooty mold here.

So why is SLF so hard to control? Here are some reasons: 

Red 4th instar nymphs on a car heel.
4th instar nymphs on wheel
(1) They are such skilled stowaways that their most-used method of getting around is through human activity. They will jump into carts, fly into trucks, attach themselves to bags, hide in clothing – they’ll hide pretty much anywhere but in water. 

(2) SLF are extremely mobile. As nymphs and adults, they are impressive jumpers. As adults they will fly short distances. They have been known to travel miles on their own by a combination of jumping, flying and walking. When you add their hitchhiking into the mix, it explains why they are spreading so quickly. 

Spotted Lanternfly infestation on apples.
(3) The needs of the swarm drive their behavior. Their mobility is necessary to meet the needs of all the members of the swarm, so they will move often to feed and affect new plants with each move. The swarm protects itself by quickly vacating an area that’s being sprayed and will often return when the spray dissipates.
Egg masses on a tree.

(4) Their egg masses are hidden in plain sight. SLF females lay their eggs on all sorts of outdoor surfaces and items that are left outside (barbecue grills, folding chairs, etc.). She covers her eggs with a substance that’s white at first, but eventually it turns tannish-brown and cracks a bit. They look just like smears of dried mud, unremarkable and unnoticed. 

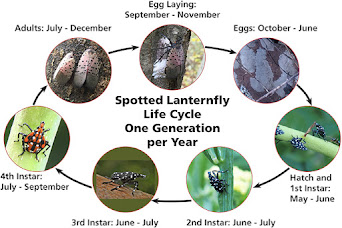
Photos in a graph showing the life cycle of the Spotted Lanternfly.
To get a grip on these wily insects, it takes a multi-pronged, diligent effort that addresses each life stage. SLF produce one generation a year, which includes an overwintering egg stage, four nymphal stages (instars) and an adult stage (more here). Egg cases need to be scraped off any surface they are found on and disposed of in such a way that they cannot survive. This can be done by putting them into a plastic bag filled with hand sanitizer or spraying them with suffocant like dormant oil. In the other stages, trunk, branch and foliar sprays will work to some extent but will probably need to be reapplied aggressively. Sticky traps and tree bands will work but must be monitored closely so that they don’t trap birds or other wildlife (more on that here) and that they do not fill up and become a bridge for other SLF. Neem oil, horticultural and dormant oils, insecticidal soaps and pyrethrins can be used as sprays. Fungicides as a pro-active pretreatment are a good idea, especially biologicals like Burkholderia spp. strain A396 and Beauveria bassiana. 
Sticky trap on a tree covered with mesh.

At this point, SLF have become part of our pop culture. They have appeared on Saturday Night Live, which is the ultimate arbiter of pop culture. This article uses them as an insult (as in don’t be one) and there is no shortage of informational and creative ways to kill them online, like this one with some yucky clips. Despite the entertainment value of these clips, it is important to remember that these are seriously invasive insects that the government is trying to control. If you come across them, they should be reported – here’s link that tells you how.Bowen Yang as a Spotted Lanternfly on Saturday Night Live.

Have fun squishing!

Submitted by Pam 


Featured Post

How Composting Helps Your Garden and the Environment

If you’re the type of person who is reading gardening articles on the internet, you’ve certainly heard of composting, even if you do not act...