Friday, November 18, 2022

It's Time To Winterize Your Plants

Close-up of a frost bubble on a plant stem.
At this time of year the weather in North America is wildly variable. As I write this, there are parts that are getting blasted by a winter storm and where I sit in Southern Arizona the weather is sunny and in the 70s. Not matter where you are sitting, it is time to get your plants winterized so they have the best chance to make it through to spring. Some of the following pointers may not pertain to your locale but others will, so take a moment to double-check your preparations.

CLEAN UP & REMOVAL

A rake laid down on a pile of leaves.
After a busy growing season, you will need to tidy things up in the fall. Now is the time to pull weeds, remove annuals and trim down perennials. Be sure to avoid cross-contamination and carefully dispose of any cuttings that may be harboring insects or diseases. Having said that, if your cuttings are clean it is best to leave some where they lie. A carpet of plant material offers insulation to plant and tree roots, provides shelter for bees and other desirable insects, and is the basis for rich soil in the spring.

A brown, black and white cat snuggled in a nest of fallen leaves. Photo by Milica Spasojevic on Unsplash.

A word about leaves:

Leaves will provide all of the above advantages and should not be removed completely. Just be sure to keep them away from the house. Undesirable insects can hide in leaf litter and migrate into the comfy warmth of your home once they get cold, but most can’t travel very far. Also, when considering your leaves please remember that they are 100% biodegradable and naturally a part of the season-change process, and that plastic is killing our planet. Please consider this thoroughly before raking up leaves and putting them in plastic bags to send to the dump.

MULCH

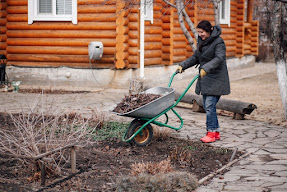
A woman in a coat and hat pushing a wheelbarrow full of yard debris toward a garden bed.
Mulch, whether commercially produced or made with your leaf litter and other materials, is an essential step in getting your plants through winter. It should be placed around plants, trees and shrubs. Be generous with it – you’ll want at least a 3-5 inch layer; and more if you live in cold country. Adding leaves, hay, straw, cornstalks and other no-compacting materials will create a more robust mulch. Save some mulch to add to your hibernating flower beds and gardens; extra organic matter in them now will pay off later.

CLOCHES

Plastic bottles with their bottoms cut off used as cloches in a garden.
If you are worried about a sudden frost and/or have smallish plants in the ground to protect, consider the simple cloche. A cloche is a usually bell-shaped cover made of glass or plastic that you can plop over your plant. Cover the plant before nightfall and remove the cloche the next day so they utilize the sun. You can purchase cloches, but there are any number of items around your house that can be repurposed. Cloches are not a solution in super-cold regimes with hard frosts.
TREES
A view up the trunk to its canopy. It is wrapped a multi-colored knitted scarf-type thing.

Trees take the first step in getting ready for winter by dropping their leaves. But we humans can take
further steps to help them get to spring. At this point in the season, a good tree wrap or frost protection bag can do a great deal to help a tree – they can temper the harsh environmental factors of winter, discourage nibbling mammals, and are an excellent barrier insect control (here are some wraps that ARBICO offers). Sunscald (caused by warm daytime temperatures that drop way down after dark), winter burn (caused by water loss through foliage) and damage caused by snow, ice and animals are all serious threats to tree health. This article gives some succinct and helpful steps to take to reduce the risk from these factors. For more on how winter affects tree, here is my blog on just that from December 2020. 

CONTAINER PLANTS

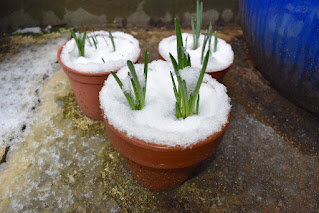
Three terracotta planters full of snow with green stems poking through the snow.
Because the sides of a pot are exposed to the elements, container plants are very vulnerable and often not able to survive the winter. If possible, bring them inside to an area that gets sufficient sunlight. Before you bring in any plant from the outside, be certain it is insect-free so that you are not introducing problem into your home. If you have large containers that cannot be moved, your best bet is to bundle them up by wrapping layers around them. This could be anything from burlap to fabric to even bubble wrap (the air in the bubbles makes a surprisingly good insulator). Another option is to remove the plant and either replant it inside or put it in a spacious container where the soil around it can act as an insulant. You may want to hedge your bets and still wrap this larger container. 

TROPICALS & HOUSEPLANTS 

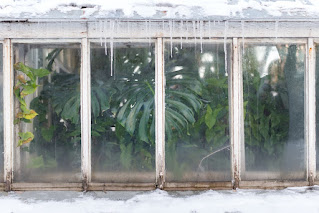
A frosty view from outside a greenhouse looking in. You can see the tropical plants inside.
Many of the houseplants that people love are native to tropical environments. This is also true of many of the popular plants and grasses used in landscaping and patio décor. All of which means that they will not survive outside in the cold. When used in outdoor settings, these types of plants should be considered as annuals. If you are not okay with having them die or having to replace them, it is probably best to not use them in the first place. Re-locating them inside may work in some instances, but you will need to provide a place that gets lots of sunlight all year round and has a stable temperature. This can be problematic since the level of sunlight goes down in the winter and the temperature inside a winter home can be all over the place. These caveats for tropical plant care extend to houseplants, as most of them are tropical as well. To further understand the particular winter needs of plants inside homes in the winter, please refer to my blog on the subject here

A purple tube blowing a bubble that quickly turns to frost.
You should keep watering your plants as usual right up until you get a hard frost. The same can be said for most garden chores. And when you get your first snow, your well-tended garden will have a strong chance of coasting through it all (read more here).

Take Care

Submitted by Pam


Friday, November 4, 2022

What’s Eating My Sweaters?


A woman's hands can be seen on the right as she inspects a pile of netral-colored sweaters.
At this time of year, people are digging into their storage areas looking for warm clothing and blankets. Unfortunately, some of these people will find that their belongings have been an insect’s meal - they’ve unwittingly welcomed clothes moths into their homes. Like people, not all moths are bad. But there are two species that can be extremely damaging to fabrics – the casemaking clothes moth (Tinea pellionella) and the webbing clothes moth (Tineola bisselliella). Of the two, the webbing clothes moth is by far the most common, so I’ll focus on them in this blog.

Closeup of an adult Tineola bisselliella - a clothes moth.
Tineola bisselliella
Clothes moths feed on natural fabrics like wool, silk, fur and leather. This extends to upholstered furniture, rugs, animal bristles in hairbrushes, and items as obscure as the wool felt pads inside pianos. Synthetics blended with natural fibers can also fall victim to the appetite of these moths. 

It is unlikely you will see the adult clothes moths because they avoid bright wide-open spaces. But, if you see a small (about ½”) moth with a fringe of golden hairs along their wings and on top of their heads, that’s an adult clothes moth. Another identifier is that they are poor flyers and basically flutter around ineffectually, as opposed to the purposeful, direct flying of other moth species.

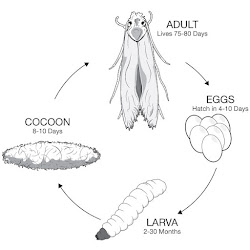
Life cycle showing (clock-wise from top) adults, eggs, larva and cocoon
It’s important to understand that killing any adult moths you may see will not fix your problem, as it is their larval stage that does the damage. Females lay between 40 and 50 eggs during their life span. Once a female has eggs, she secretes an adhesive substance that she uses to attach her eggs to fabrics. In warm weather, these eggs can hatch in 4-10 days and in the warm interior of homes this process can go on year-round. Once the eggs hatch, they dig into the fabrics they were placed on and use them for food and shelter. 

Close-up of an adult clothes moth with larvae on a white garment.
Moths with larvae
The locations that female clothes moths prefer are dark, warm, humid, and out of sight. Closets and storage areas perfectly fit these preferences, as do seams in clothing, crevices in furniture and under collars. The hidden nature of these larval homes can make it challenging to discover and control. Some indicators that you are dealing with a clothes moth infestation are silky little tunnels, furrows, or tubes on clothing, furs that shed excessively, crusty deposits that resemble mucus, webby bits, and irregular holes in fabrics. As with many other types of insect control, preventative steps are often the best first steps. Here are some recommendations:

Clothes hanging in a closet . It may seem indelicate to say, but good housekeeping and only storing clean garments helps immensely. Clothes moths are drawn to materials that are holding body oils and food residue. They will also find areas in the home that don’t often get deep-cleaned, like under furniture.

Three photos illustrating how a vacuum-compression bag works.

Store items in a sealed storage bin, vacuum-compression bag, or any other tightly-sealed storage situation. 

Whenever possible, store clothing by hanging it instead of folding it. The larvae are drawn to folds they can hide in. If you store items in a hanging garment bag, be sure to thoroughly tape up the zipper and closure area.

Rotate items in a closet regularly so that nothing stays hidden in the dark too long. 

A cedar chest full of heirlooms.
Periodically air out and allow light into your closet or storage area – clothes moths will abandon an area if they cannot find a spot safe from bright light.

A few words about cedar: For hundreds of years people stored their garments in cedar chests and cedar-lined closets in the belief that cedar keeps the moths away. We now know that the efficacy of cedar as a deterrent/repellent wans as soon as the oils dry. However, if you use a cedar chest and it closes tightly it will act as a barrier control long after the oils are gone.

Mothballs falling out of a jar onto a burlap surface.
Mothballs are another traditional method of control that is still recommended with some caveats. These aromatic spheres are strong pesticides that work best in ample numbers in closed environments, which means that the fumes can build up and make you sick. Additionally, the chemicals in moth balls can soften plastic, which may allow moths to enter.

Men dressed as moths reacting to and dancing around a light.
Cleaning up an infestation includes many of the steps delineated above, with a few additional deep-cleaning steps and pesticidal options. Adding sticky traps to the area when possible is also effective, as are pheromone lures/traps. These types of traps eliminate the love-hungry males and cut down on future generations. Here are some additional guidelines from the famous home guru, Bob Vila. Although labor-intensive, prevention and elimination of clothes moths is possible.

Take Care

Submitted by Pam  


Featured Post

Why It is Important to Test and Know Your Soil

You’ve likely heard something along the lines of, “Good soil makes good crops” if you’ve been gardening for any amount of time, but do you k...