Tuesday, November 12, 2024

Winterizing Your Garden: Key Steps to Stop Pests and Pathogen This Fall


The best time to prepare your garden is right after the growing season ends! 


Getting a head start on pest prevention during the fall and into the winter can do so much for your spring and summer gardens. As winter draws near, overwintering pests may see your garden and greenhouse as a safe haven. But little do they know, you’re about to take the right steps to keep them out this winter.

In this article, we’ll explore:
  • How to use beneficial nematodes to reduce overwintering pest populations.
  • The importance of soil testing and amending for pest-resistant spring plantings.
  • Key strategies for sanitizing, cleaning, and planning pest and disease control.
Let’s explore the essential steps to prepare your garden or greenhouse for winter while promoting long-term pest control and plant health.
 
Using Beneficial Nematodes to Your Advantage


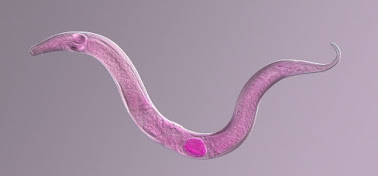
Beneficial nematodes are microscopic worm-like creatures that can seek out and destroy soil-dwelling pests, like pupating grubs, root maggots, and caterpillars. 


Many pests will burrow down into the soil to escape freezing temperatures and will stay there until they emerge as adults in the spring.

These nematodes can be purchased and applied throughout your garden and greenhouse space. However, be sure to read the instructions for proper application. The optimal time to apply them is usually when the soil temperatures are between 42°F – 95°F.

Nematodes are great at targeting and reducing any pupating pests before they settle in for winter. This helps prevent any spring pest outbreaks and helps your plants grow unhindered by pest damage.

To give your nematodes the best conditions to thrive, make sure your soil is moist and you increase the organic matter in the soil with compost and amendments. Check out our FAQs page about nematodes to learn more about how to properly apply them.
 
Soil Testing and Amending for a Pest-Resistant Garden in Spring
A healthy, balanced soil creates healthier, pest-resistant plants. The best time to test your soil health is during the fall, so you can better understand your nutrient levels, pH balance, and organic matter content. That way, you’ll be able to add the perfect amount of amendments to get your plants off on the right start.

Nutrient deficiencies can lead to stressed plants, which are more susceptible to pests. Conversely, nutrient-rich, well-balanced soil promotes a higher brix level in plants. Higher brix levels create stronger plants, which also makes them less attractive to pests like aphids and caterpillars.

If you’re to boost your soil health after a soil test, consider these amendments:

  • Organic matter: Adding compost, manure, or leaf mold helps improve soil structure, encourages beneficial microbes, and increases water retention, all of which promote strong, healthy plant growth.
  • Lime or sulfur: Depending on your soil’s pH results, you may need to raise or lower the pH to reach an optimal level for plant growth. Adjusting the pH to the proper range for your crops can reduce the likelihood of nutrient imbalances that attract pests.
  • Minerals and fertilizers: If your soil test reveals deficiencies in essential nutrients like nitrogen, phosphorus, or potassium, adding the appropriate organic fertilizers can help.

By testing and amending your soil in the fall, you’ll be ready for spring planting with the best conditions possible.
 
Prevent and Control Diseases with Biological Agents

Not only should you be preparing and planning for insect pests, but plant diseases and pathogens should be on your mind too.

Plant diseases are often caused by pathogens that can persist in the soil or plant debris through the winter. These pathogens, including fungi, bacteria, and viruses, can be present on dead plant material or in the soil and can easily infect new plants in the spring.

To prevent this, remove and dispose of any diseased or infected plant material.


Clearing dead leaves, stems, and other debris from your garden is crucial, as this organic matter can harbor diseases and pests.

To better prevent the spread of these pathogens, consider these tips:

  • Organic fungicides: Apply copper or sulfur-based sprays to protect against fungal diseases like powdery mildew, blight, and rust.
  • Beneficial bacteria and fungi: Use organisms like Bacillus subtilis or mycorrhizal fungi to outcompete harmful pathogens and support root health.
  • Crop rotation and cover crops: Rotate crops to break disease cycles and plant cover crops, like clover or rye, to improve soil health and suppress disease.
  • Sanitization: Clean and disinfect greenhouses, tools, and containers to remove lingering pathogens and prevent disease spread.

By incorporating these disease prevention strategies in the fall, you’ll create a cleaner, healthier growing environment for the spring. Reducing pathogen presence now will lead to fewer disease issues and healthier plants next season.
 
Clean Up and Planning for Next Season

Insect pests will be looking for a cozy spot to get through the winter. That means that you should eliminate these hiding spots as soon as possible. Pests will often hide under leaves, plant debris, rocks, or leaves. Clearing these away and disposing of them will eliminate any pests that are trying to get through the winter undisturbed.

Additionally, row covers can be an excellent tool to protect your plants from both pests and cold weather. 

They create a barrier that keeps pests like aphids, beetles, and moths from accessing your crops while also providing insulation.


Make sure to secure row covers tightly to prevent pests from sneaking in and damaging crops as the temperatures drop. This will help you maintain healthy fall plantings while protecting your soil for spring.

Every avid gardener gets through the winter by dreaming, scheming and planning what the next growing season will look like. As you plan out your garden, consider adding companion planting and crop rotation to your strategies in preventing pests from ruining your crops.

Alongside pest prevention, it’s important to create an environment that supports beneficial insects like ladybugs, lacewings, and predatory wasps, which naturally help control pests. Planting flowers such as alyssum, yarrow, and dill in your garden can attract these helpful predators and provide them with food and shelter.

Preparing your garden or greenhouse in the fall is one of the most effective ways to prevent overwintering pests and set the stage for a healthier growing season. By taking proactive steps now, you can reduce pest pressure, support beneficial organisms, and give your plants the best chance for success in the spring.

With the right preparation now, you’ll enjoy a more productive, resilient garden in the seasons to come. Make sure to check out Arbico Organic’s full line of products to produce the best garden yet next year!

Thursday, October 3, 2024

How Composting Helps Your Garden and the Environment

If you’re the type of person who is reading gardening articles on the internet, you’ve certainly heard of composting, even if you do not actively practice it. And it’s no surprise that you’re familiar with composting! 

It’s been around since humans began spreading manure on their cropland 5,000 years ago to boost plant growth. While composting still provides as many nutrients today as it did in early human civilizations; today, composting is more commonly associated with an environmentally conscious lifestyle.

As we all know, composting is a natural process that transforms organic waste into a nutrient-rich soil amendment. As you create this soil amendment, you’re also reducing waste and reducing your trash burden on your landfill. In 2019, a study completed by the EPA showed that only 5% of food waste was composted. Reverse, the numbers, and a staggering 95% of America’s compostable food waste is in our landfills.


Feeling guilty because you are part of the 95%? 
Don’t worry, 
Starting a compost pile is incredibly simple!

To create a compost pile, gather organic materials like:

KITCHEN SCRAPS
    • produce cuttings
    • coffee grounds
    • eggshells


YARD WASTE 
    • leaves
    • grass clippings
    • small branches
    • newspaper
    • cardboard. 


Layer these materials, alternating wet and dry components to maintain a balanced moisture content.
 
It’s important to note that traditional composting does require outdoor space, though your compost bin can be placed in either sun or shade. Turn the pile regularly to aerate the materials and speed up the decomposition process. A sunny spot will decompose faster than a shady spot. After several weeks or months, the compost will be dark, crumbly, and earthy smelling. Add this finished compost to your garden soil to improve its nutrient content and water-holding capacity.

While anyone can start composting at almost no cost, there are supplemental materials that can be purchased to improve your composting experience. We’ll highlight three of our favorites from ARBICO Organics below.


EM-1® Microbial Inoculant
Looking to speed up your composting? 
Adding additional microorganisms to your compost pile can help with this. 

EM-1 can be applied directly onto compost through a sprayer. Since your compost breaks down faster, this reduces breeding sites for insect pests attracted to decaying matter. 

SCD All Seasons Bokashi Indoor Composting

You’re familiar with composting at this point, but have you heard of bokashi? Like traditional composting, bokashi converts organic waste into a nutrition-rich soil amendment. However, there are drastic differences in how this soil amendment is created. Unlike composting, bokashi is an anaerobic process (it does not need oxygen). There is no decomposition in bokashi. Instead, bacteria ferment the waste. Finally, bokashi can be done indoors! Since there is no decomposition in bokashi, there are no strong smells. If your bokashi is smelling, that’s a sign that something has gone wrong, and you’ve reverted to traditional composting.

ARBICO’s EM•1 Bokashi is made with certified organic rice bran, Super C EM-X Ceramic powder, EM•1® Microbial Inoculant, and molasses. EM•1. The Microbial Inoculant helps balance the microbial ecology of the soil and supply nutrients to your garden. Using this product to recycle your kitchen waste helps your lawn and garden while reducing landfill inputs.

To learn more about the bokashi process read this article and check out the instructions tab on the product listing on ARBICO’s website.


ARBICO Organics® Red Composting Worm Mix
A lot of attention is given to microorganisms and imperceptible chemical reactions nowadays. However, sometimes the best thing for your soil and compost is something visible to the naked eye. This red composting worm mix contains three of nature’s most efficient soil aerators: Eisenia fetida, Eisenia hortensis, and Perionyx excavatus. Purchasing worms allows you to do double duty in your compost bin and your garden. Worms can speed up the decomposition of your compost and aerate your garden soil. If it is difficult for oxygen to penetrate your soil, the microorganisms in the soil will struggle to survive. This includes nitrogen-fixing bacteria, which play a critical role in delivering nitrogen to plant roots.

Whether you’re nervous about putting together your first compost bin or you’re a seasoned professional who has been composting for years, check out the composting and organic gardening supplies at our website - Robin @ ARBICO Organics

Wednesday, September 4, 2024

Understanding Annual & Perennial Plants and Why You Want Both in Your Garden


How familiar are you with the differences between annual and perennial plants? 


If you’re a seasoned grower, you’re familiar with the differences. However, if you’re just getting into gardening, it can be difficult to distinguish between these two types of plants.


The primary distinction is that annual plants complete their life cycle in a single growing season. 
From seed to full bloom, this type of plant comes with spring and dies with the frost. 

Perennials are able to overwinter successfully and will bloom again next growing season. If you’re thinking, why bother with annuals at this point, you’re asking the logical question. If you’re guaranteed to lose your flowers once winter hits, doesn’t it make more sense to buy a flower that will live for many years? 

Annuals offer several benefits that perennials do not. First, annuals have a longer blooming period than perennials and tend to have brighter, more vibrant flowers. Many annuals will bloom throughout summer while many perennials may only bloom in early summer. During the prime of a growing season, you can count on annuals to continuously brighten your garden. For some growers, color is the most important aspect of their garden, which leads them to prefer annuals. 

If you’re at the stage where you just want something to grow and aren’t as concerned with your garden’s color palette, don’t immediately default to perennials. Just because they are capable of living through the winter does not mean that perennials automatically survive. Many perennials need to be trimmed and pruned between growing seasons, while annual plants are more forgiving, usually only needing the typical water, fertilizer, and sunlight required by all plants.

If you’re looking to get your bearings, here’s a quick list of five common annuals and perennials:

Annuals

Petunias: Known for their vibrant colors and sweet fragrance. 

Marigolds: A classic choice for gardens, with a strong, earthy scent.

Zinnias: Available in a wide range of colors and sizes. 

Cosmos: A delicate and airy annual with a long blooming period.

Sunflowers: A cheerful and iconic annual with large, golden blooms.


Perennials


Daylilies: Known for their abundant blooms and ease of care.
Peonies: A classic perennial with large, fragrant flowers.

Lavender: A popular choice for its calming fragrance and beautiful purple blooms.

Hostas: A versatile perennial with striking foliage in various shades of green, blue, and yellow.

Black-eyed Susans: A cheerful perennial with bright yellow petals and dark brown centers.

We’ll end this article with a special mention of frost cloths. 
Frost cloths are a special type of fabric that protects plants from frost damage during cold nights. A frost cloth isn’t magic once there’s snow on the ground and nightly temperatures are regularly in the single digits, you can’t just place a frost cloth over some seeds and expect a bountiful harvest in a month. Instead, frost cloths allow you to extend your growing period past the first frost date (and you can also begin growing before the last frost date). This is especially valuable if you’re growing vegetables, as it increases the number of harvests in the growing season. 

For more info on frost cloths, check out this article. - Robin @ARBICO Organics

A Four Step Solution to Fly Control


If you raise horses or livestock, you’re familiar with flies. 

Too familiar, most likely. 


While a casual gardener will likely notice an increase in fly presence if they’re maintaining a compost pile, that pales in comparison to the struggles that ranchers undergo when dealing with fly populations. If you’re regularly working with horses and livestock and have struggled to keep your fly population under control, start by changing how you approach the issue. 


You can’t control a fly population by swooping in with a chemical “bomb”. 
Sure, you can kill a lot of flies with heavy application of pesticides, but a one-off, intensive coating of pesticide will only temporarily reduce a fly population. 


Instead, we recommend investing in a continuous 4-step control program to permanently solve your fly infestation. 


Flies breed in and are attracted to a variety of locations. 
Here’s a quick list to keep in mind while you read this article: 


Manure & Urination Areas: 
• Barns, stables, stalls, hospital pens, or loafing sheds
• Around corral posts, paddock areas and fence lines
• Around manure piles, pits, bins, or carts
• In kennel or coop areas
Watering & Feeding Areas:
• Under water troughs, near barrels, buckets
• Where spilling, dripping or leakage occurs
• Around bathing areas, drainage sites, and run-off areas
• Areas where feed, straw, or hay have decomposed
Other Fly-Breeding Areas:
• Around compost piles and family gardens
• Alongside garbage cans


The 4-Step Fly Control Program

1. Invest in a Form of Sustainable, Biological Population Control
Continuously spraying harsh chemicals will do little to solve the underlying issues that lead to explosions in fly populations. Additionally, if you’re using pesticides, you’re spraying them in barns, corrals, and other locations where horses and livestock spend time. The same chemicals that kill off flies can also cause skin irritation in horses. Prolonged exposure can lead to difficulty in breathing and digestion issues.

Try Fly Eliminators instead. Fly Eliminators are parasitic wasps that kill fly pupae. They’re not interested in humans or livestock, so there’s no worry of livestock experiencing the unintended consequences of heavy pesticide use. The Fly Eliminator will burrow into the fly pupae, killing it before it develops. Remember the fly hotspot list we previously provided? When first introducing Fly Eliminators to your ranch or garden, focus on these locations. Around the perimeter of these hotspots, make an indent in the ground with the heel of your shoe, then deposit a handful of eliminators in this indent before covering it with dirt or straw. Reapply every 3-4 weeks. If fly pupae are unavailable, the eliminators will simply die off.


2. Manure Control


Flies love manure so much because it provides their offspring with necessary nutrients while being poisonous to many birds and other common insect-eating predators. Flies find manure by its smell, and when you get the large piles that happen in a stable, you’re making it really easy for flies to find their preferred breeding ground. To accelerate the breakdown of manure, try using a product such as SCD Barn Kleaner.


3. Maggot Control
While Fly Eliminators do a great job of eliminating pupae, it’s important to have an answer for each stage of fly development, and those that come from maggots, or larvae, are the stage of a fly’s life cycle that precedes the pupae. Hister beetles or nematodes are natural predators of maggots who, like Fly Eliminators, don’t concern themselves with larger organisms. We’ve put together a separate article on nematodes, so check that out if you’re curious about the benefits that a healthy nematode population can have on pest management.


4. Adult Fly Control
No pest control is 100% effective, and there will be adult flies that make it past the
larval and pupal stages of development. A simple, non-chemical method of dealing with adult flies is to set up a solar fly trap. This will lure flies away from manure piles and into the baited trap. Once the flies are in the trap, they are baked alive by redirecting and focusing the heat of the sun. Setup is simple and takes seconds—check out this video if you want to see the solar fly trap in action. - Robin @ARBICO Organics

Marching and Munching: The Fall Armyworm Invasion


There's nothing worse than seeing a horde of fall armyworms mowing down that lawn you've been painstakingly trying to care for all year!


Fall armyworms (Spodoptera frugiperda) are a significant pest that can cause severe damage to lawns and turf, pastures, and grain crops. As a homeowner or lawn care professional, understanding how to identify, manage, and prevent these pests is crucial to maintaining healthy, vibrant lawns.

In this article, we'll learn about the life cycle of fall armyworms, how to identify them, recognize their damage in turf, and implement eco-friendly methods to control populations and prevent infestations.


Identification and Lifecycle
Fall armyworms are typically identified by their smooth bodies and distinctive, inverted "Y" marking on
their heads. The caterpillars can vary in color from green to brown to almost black, depending on their age and the environment. They also have a wide dark stripe that runs alongside their body. They can often grow to 1 to 1.5 inches long.

The lifecycle of the fall armyworm is divided into four stages: egg, caterpillar, pupa, and moth. They usually overwinter in more southern portions of the US as a pupa in the soil. As soil temperatures increase in the spring and early summer, the pupae will emerge as moths and begin migrating to northern locations.

In mid-summer, adults will mate, and females will lay eggs. A single female can lay upwards of 1,000 eggs, and it only takes 2-10 days for the eggs to hatch.

The caterpillars grow through 4 instar stages. They will feed day or night but are most active around dusk and dawn. If populations are large enough, the caterpillars can often crawl side by side, mowing down vegetation as they advance toward your lawn. That's where the name "armyworm" came from.

After 2-3 weeks of feeding, fall armyworms dig into the soil and pupate. Multiple generations can occur each year if conditions are right.

Understanding this lifecycle is key to effectively managing fall armyworm populations, as interventions can be timed to target the most vulnerable stages.

 
Damage and Symptoms
Fall armyworms can cause significant damage to lawns and turf, often before their presence is even noticed. Early instar larvae primarily feed on the upper leaf surfaces, creating "windowpane" effects where the leaf tissue is chewed away, but the lower epidermis remains. This type of damage may initially appear as small, translucent patches on the leaves and is typically not too severe.

The first three instars feed on the upper leaf surfaces, creating "windowpane" effects where the leaf tissue is chewed away, but the lower epidermis remains. This type of damage may initially appear as small, translucent patches on the leaves and is typically not too severe.

However, the last instar is where the caterpillars gain their appetite. Almost 85% of grass damage is done by this 4th instar!

The caterpillars consume entire leaves at this stage, often leaving behind only the stems. This can result in large patches of dead or dying grass, which may appear brown or tan.

Other symptoms of fall armyworm damage include irregular patches of thinning grass, frass (insect
droppings), and the caterpillars themselves. Identifying these symptoms early is crucial to implement control measures before significant damage occurs.

 
Eco-friendly Methods to Control
Controlling fall armyworm populations in an eco-friendly manner involves a combination of prevention, using organic insecticides, and encouraging natural predators. These methods help manage infestations and protect the environment and beneficial organisms.
 
Monitoring and Prevention
Regular monitoring is crucial for early detection and effective management of fall armyworms. Inspect your lawn during mid-summer and early fall, especially early morning or evening. Look for the characteristic "windowpane" damage on grass blades, frass, and caterpillars.

If you have a large lawn or yard, you can deploy pheromone traps to check when females are flying and if your control measures are working.
 
Organic Insecticides
Organic insecticides can be an effective and environmentally friendly option when intervention is

necessary. Products containing Bacillus thuringiensis (Bt) are widely used against caterpillar pests, including fall armyworms. Bt is a natural bacterium that produces toxins harmful to specific insect larvae but is safe for humans, pets, and beneficial insects. However, keep in mind that Bt residues don't last more than two days on grass, so you'll need to spray frequently for good coverage and control.

Neem oil, another organic option, disrupts the life cycle of insects and deters feeding. It's important to follow the application instructions carefully and apply these treatments during the early larval stages for maximum effectiveness.

Additional insecticides include pyrethroids and spinosads; however, these are ineffective against larger fall armyworm caterpillars. Make sure to time this with their early hatching or growth stage.
 
Natural Predators
Encouraging natural predators in your lawn can provide long-term control of fall armyworm populations. Birds, predatory beetles, and parasitic wasps are some of the natural enemies of these caterpillars. Planting a diverse array of flowers and shrubs can attract these beneficial predators. Additionally, reducing broad-spectrum insecticides helps protect these natural allies, allowing them to thrive and naturally reduce pest populations.

Implementing these eco-friendly control methods helps manage fall armyworm infestations and promotes a healthy and sustainable lawn ecosystem.
 
Fall armyworms are a significant threat to lawns and turf, capable of causing extensive damage if left unchecked. Understanding their lifecycle and recognizing the symptoms of an infestation are crucial first steps in managing their numbers. If you are early to catch them and take action quickly, you can effectively manage and prevent infestations. - Grant @ARBICO Organics

Monday, August 12, 2024

How to Eliminate Fire Ants From your Yard and Garden

Fire ants are the type of pest that spell trouble for a garden and the people tending said garden. 

Good growers make sure to keep an eye on the inhabitants of their gardens and have pest control plans in place to cull invasive species, and fire ants get top billing due to the adverse effects fire ants have on humans. 

To clarify, we’re discussing Solenopsis invicta, also known as the red imported fire ant (RIFA), but we’ll continue to refer to this species as simply “fire ant” throughout this article. 


Of course, fire ants were not always an issue in the United States. In fact, it’s entirely possible that you’ve lived in the USA your whole life and never encountered a fire ant. Fire ants originated in South America and are suited to a tropical climate. They do poorly in cold winters and when exposed to freezing temperatures, which confines them mostly to the Deep South in the United States. Smaller fire ant populations have also settled into Southern California, Arizona, and New Mexico. 
 

The red imported fire ant made its way to US soil in the 1930s. While it is impossible to know the exact date that fire ants invaded the US, it is widely agreed that the fire ants were brought from South America to the US on trading ships. These ships used soil as ballast, unknowingly transporting fire ant colonies northwards. Eventually, one of these fire ant colonies escaped the hull of the cargo ship and onto US soil. At this point, the fire ant population exploded due to the lack of natural predators, and the ankles of those living in the Deep South have never been the same. 
 
So, what happens when fire ants establish a colony on your property? How do you get rid of fire ants? In addition to the 14 million people who are stung by fire ants each year in the USA, fire ants also cause $6.7 billion in environmental and agricultural losses annually. They also crowd out beneficial insects and larger animals, such as ground nesting birds. Because of their lack of natural predators in the USA, there is no “wait-and-see” approach with fire ants. If you don’t take action, the problem will only get worse. 
 
The first treatment is a home remedy that can be done by anyone with a bucket, though it is not perfect and requires favorable conditions. The process is simple: fill a bucket with 3 gallons (at minimum) of near-boiling water. Poke a hole in the fire ant mound - use a broom handle, not your finger - then pour this water into the mound. However, there are several issues to keep in mind when using this method. 

  1. This method is only going to eliminate 40% (on average) of a fire ant population per application. You need to do this several times to have a good chance of killing the queen. 
  2. The fire ant mound needs to be visible. While many mounds do appear as elevated clumps of dirt, not every fire ant mound is visible above ground. 
  3. You need to locate the mound! Just because you have fire ants in your garden doesn’t mean that the mound is on your property. The dirt mound has no entrance. Instead, fire ant workers build tunnels that can extend several feet from the mound, emerging far away from their queen. 
  4. Hot water will cause collateral damage to any plants that are nearby. 

When dealing with fire ants, you can make some progress with homemade remedies,


but we honestly recommend using a professional product. You aren’t just risking the health of your garden or lawn; you’re also risking the health of your family and pets. It’s best to eliminate fire ant colonies as soon as possible. 

Specialized products such as Orange Guard® Fire Ant Control can replace
scalding water and are much more effective, lingering in the burrow and dissolving the exoskeleton of fire ants. It’s also safe to use around plants, unlike scalding water. Once the population has been reduced through a liquid pesticide, target the soil of the burrow to kill off the stragglers. 

Mix a product like Perma-Guard™ Crawling Insect Control into the soil to add diatomaceous earth to your yard. This is non-toxic to plants and larger animals such as birds or common household pets. The diatomaceous earth will absorb oils and fats from a fire ant exoskeleton, causing it to dry out and die. 
 
Fire ants are a terrible problem to deal with. Luckily, it’s not an impossible problem. For fire ant and other pest control needs, visit ARBICO Organics for over 40 years of expertise in pest control solutions designed for professionals and hobbyists alike. 


Wednesday, July 17, 2024

Why Nematodes Can be “Good” or “Bad” for your Garden

Entomopathogenic Nematodes

Ever heard of a
NEMATODE?
 
You might be more familiar with their colloquial name, which is roundworm. For the purposes of this post, we’ll refer to this creature as a nematode going forward but know that nematodes and roundworms are the same creature. Nematodes are found all over the world and are classified as extremophiles, which means that they have the ability to survive in climates such as polar deserts, the deep biosphere, and inside animal intestines! Wikipedia even lists a species of nematode (Caenorhabditis elegans) as being able to survive atmospheric descent back to Earth’s surface. 

Even though nematodes have a wide variety of quirks and interesting characteristics, you don’t need to make your way to the Arctic Circle to observe these creatures. Nematodes can be found in your backyard—millions per square yard of soil—and they’re commonly divided into two categories: beneficial and harmful nematodes. If you want to keep things simple, good and bad nematodes will also work. 

“Good” Beneficial Nematodes - 

AKA “Entomopathogenic Nematodes”


  • Entomopathogenic defines an organism that infects and causes disease to insects. 

Courtesy of BASF
You may be asking how is that a good thing? Fortunately for gardeners and growers, beneficial nematodes primarily target a multitude of soil-based plant pests as their hosts! These nematodes will parasitize and/or kill insects that are harmful to plants and they are considered non-toxic to humans and pets!

There are various species of entomopathogenic nematodes that exhibit different behaviors and pest insect preferences and have been studied in detail for their use against plant pests in agriculture for many years. Because of all of this research supporting their positive impact, the great news for you is that they are commercially reared and available for you to use in your own garden! 

Using beneficial nematodes to control unwanted plant pests reduces the need for
chemical pesticides, which in turn eliminates the frequent harmful byproducts found in commercial pesticides that can cause lasting environmental damage. 

Beneficial nematodes are effective against over 200 common pest insects including grubs, fleas, fungus gnats, beetles, weevils and more! To determine what type is most effective for the pests you are dealing with, you can read this pest selection guide!

“Bad” Nematodes – 

AKA “phytopathogenic Nematodes”


  •       Phytopathogenic defines an organism that is parasitic to plants. 


Harmful nematodes, such as root knot nematodes (Meloidogyne incognita) and cyst nematodes (Glob Odera pallida), are notorious for their damaging effects on plants. These nematodes invade plant roots, causing galls and lesions that disrupt nutrient and water uptake. Once infested by the parasitic nematode, the plant will have stunted growth and will begin yellowing. 

Parasitic infections aren’t the only negative effect certain species of harmful nematodes can have on your plants. For example, the root-lesion nematodes of the Pratylenchid genus are known to carry fungal pathogens that cause root rot. As the nematode feeds on the plant’s roots, entry points are created for root rot pathogens. While the overall effects of parasitic and disease-carrying nematodes both result in plant death, disease-carrying nematodes attack plants on two fronts: the physical damage to the plant from root eating and the damage caused by diseases entering the damaged root system. 

What about me? There are nematode species like Ascaris, Trichinella, and hookworms that can infect humans and livestock, but they are very different from the kind that are available for commercial pest control use. These malignant nematodes primarily target and inhabit the intestines of animals causing symptoms ranging from mild gastrointestinal discomfort to severe malnutrition and organ damage. The nematodes discussed above in this post are all species that are harmful to either plants or insects, and they pose no known risks to humans and animals and can be applied without concern near homes, pets and children!


By Robin @ ARBICO Organics

Featured Post

5 Cool Things About Nematodes

It’s September, and here at ARBICO, it’s Beneficial Nematode season. Every year we put our Beneficial Nematodes on sale at this time to enc...