Wednesday, February 27, 2013

Great Soil is the First (and Best)
Method for Fighting Weeds

When I was just discovering my passion for growing things, one of our neighbors, an experienced gardener, gave me the best soil tutorial.  On one of her walks, she noticed as I struggled to deal with weeds in my drought stricken yard.  She stopped to chat and casually mentioned that I really needed to work on the tilth of my soil.  When I asked what that meant, she kindly invited me to check out her garden – it would be better to see and feel what she meant. 

When she poured some of her soil in my hand it was clear that what I saw, felt, and smelled was very different from the dirt that I was dealing with.  I had an immediate and visceral reaction to the wonderful musky richness.  The soil was soft and darkly colored and it felt good – plump, moist, lively – not thin, grainy and dry like the stuff I was dealing with.   She told me that this was my goal in the garden - create soil that was dark brownish-black and smelled good, clean and earthy and held together but did not clump or fall through my fingers when moist.

How to accomplish this?  Her message was simple –back off the chemical fertilizers, feed the soil by adding organic matter and she promised that over time my soil would become like hers and I would have no weeds.  Really?  No weeds???  I was a skeptic at first but over time I have learned that if I cultivate healthy soil and I make sure to water and fertilize properly* – weeds are unlikely to grow in such a healthy soil environment.

In the ensuing decades (yes decades), I’ve learned that most of us don’t inherit or buy a piece of land with great soil, the fact of the matter is that we need to improve the soil with every growing season.  Our best friend in the garden is soil that is rich in micro-nutrients, has enough macro-nutrients to support what we are growing, and has abundant microbial life.  Good soil encourages:
  •  The break down of organic matter.
  •  Microbial life that develops good soil structure.
  •  Fights pathogens that would harm plants and
  •  Transforms minerals so they can be better used by plants.
It’s not that I never have any weeds, but the weeds I do have are easy to manage.  Another great lesson learned from a fellow gardener – pull weeds in the first 15 minutes you are in the garden and that bend and snap helps warm-up your muscles and joints in preparation for the tough gardening ahead.  Smart advice to help avoid an aching back!

*Watering and fertilizing properly are dependent upon many factors – soil, temperature, humidity, wind, and the type and health of the plants you grow.  It is important to know how all of these factors influence your garden’s needs.  Responding appropriately is a lot easier with knowledge.  Just remember “The Three Bears” – not too much, not too little, just the right amount of water and fertilizer are very good things!

Wednesday, August 15, 2012

Managing the Japanese Beetle – A Short Course for the Homeowner

The Japanese Beetle has made a home in many parts of the U.S. and while we can’t get rid of them, we can manage them to reduce the damage they do to trees, plants and lawns. Because adult stage beetles are so mobile, managing their population requires a bit of planning and effort. Understanding their life cycle will help you know what to do and when to do it. Here are some tips to help you gain control of this pest:

Adult Japanese beetles emerge from the soil in late spring or early summer. This is the stage when they are causing visible damage in your garden. Hard-bodied insects like the Japanese Beetle are tough to kill. Using a combination of Bon-Neem insecticidal soap and pyrethrin such as Pyganic will act as a one-two punch to kill the beetle. The insecticidal soap penetrates their shell enough to weaken and dehydrate the insect allowing the pyrethrin to be absorbed by the insect, killing it. These products are natural and can be used on all types of plants and crops.

During the summer feeding period, the adult females burrow 3 inches into the soil, lay a few eggs and then repeat this process throughout the summer. A single female will lay 40 to 60 eggs annually.

The eggs develop into larva (the grub stage) as the temperatures begin to cool in September and October. As temperatures continue to cool, the grubs move deeper into the soil to survive the winter temperatures.

The Japanese beetle spends about 10 months of the year as larvae in the soil. In spring, the grubs begin to move up through the soil toward the warming air – this is when the grubs voraciously feed on the roots of plants and turf. This is the time to use beneficial nematodes (the variety Heterorhabditis bacteriaphora) and Milky Spore (Bacillus popillae) to kill the grubs and reduce adult emergence.

There are no easy solutions for controlling the Japanese Beetle, but with knowledge and planning we can reduce the damage caused by this invasive pest. Just remember:

  • Spring and late summer use in-soil controls: NemaSeek Beneficial Nematodes (Heterorhabditis bacteriaphora) and Milky Spore (Bacillus popillae).
  • During the summer for adult beetles use Bon-Neem insecticidal soap and Pyganic pyrethrin knockdown spray.

The USDA has published a great handbook for managing the Japanese Beetle. The handbook is available in a printable version online for your use. Here is the link to the handbook: Managing the Japanese Beetle: A Homeowner’s Handbook. Learn more about natural ways to control Japanese Beetles.

Thursday, May 24, 2012

Soil is the Soul of your Garden


Organic gardeners and farmers know that the organisms that live in a well-balanced soil are the very heart of that soil. The ideal is a loamy soil, a mixture of sand, silt, clay and decaying organic material. The presence of decaying organic material is an indicator that the soil is healthy and rich and has great potential for supporting plants.

Most of us have soil that is too sandy, has too much clay, is too acidic or too alkaline - the list is long and varies dependant on where you live. There are many things that you can do to improve the quality of your soil and the first step is to determine what type of soil you have and its general health.

Sandy, Clay or Loam?

If your soil is too sandy, you probably have a problem with retention of water and nutrients. Soil that has too much clay is dense and heavy because it is composed of particles that are small and bind tightly together. Clay soil can be difficult for healthy root structure and growth. A quick way to test which type of soil you have is to take a handful of moistened soil in your hand and squeeze. If the soil binds together you have too much clay. If the soil falls apart as soon as you open your fist, you have too much sand. If your soil holds together but does not clump you may be fortunate enough to have loamy soil.

The easiest and most important way to improve or maintain any soil type is by using compost. Adding
compost can help these specific soil problems:
  • The addition of compost to sandy soil will help bind loose particles together to increase the ability of the soil to retain water and nutrients.  
  • By adding compost to clay soil, you help to form larger soil particles as the compost will bind with the clay – this will increase the air space around the particles allowing for better drainage and air movement.  
  • Annual applications of compost to any type of soil add life and vitality as well as essential nutrients.
How Healthy is Your Soil?
To find out if your soil has good nutrient value it is best to start with the basics.
  • Determine whether your soil has the basic nutrient components of nitrogen, phosphorous, and potash.
  • Determine the pH level of your soil. pH tests indicate the soil’s acid and alkaline levels.

ARBICO Organics carries two easy-to-use soil test kits. The Rapitest Kit includes enough materials to perform 10 tests for pH, nitrogen, phosphorous, and potassium. The LaMotte Garden Soil Test Kit features a rapid test procedure and comes with diagrammed instructions and enough material to perform 30 pH tests and 15 tests for nitrogen, phosphorous, and potassium.

Once you have the results of your soil test, ARBICO Organics has a wide variety of products to make your soil healthier and more productive. Take a look at our easy-to-use soil solutions guide that tells you what soil amendments or supplements we recommend to help improve your soil and your garden.


Wednesday, May 2, 2012

Don’t Forget to Feed the Leaves!

Watering PlantUsually we think of feeding or fertilizing our plants as adding fertilizer to the soil but the leaves can benefit as well. Foliar feeding is simply the application of fertilizer to the leaves of plants, giving them a boost of nutrients that they may not be getting enough of from the soil alone.

What’s the benefit of Foliar Feeding?
A foliar feeding helps address the immediate needs of the plant. The primary benefit of foliar feeding is that it is the fastest way to deliver a corrective infusion of micronutrients. There is also evidence that a periodic foliar feeding will increase the activity in the leaves, increasing chlorophyll production and photosynthesis which drives increased water and nutrient uptake from the soil

How does that work?
Plants absorb the nutrients through small openings on the stems and leaves called stomata.  Research shows that plants absorb fertilizers faster through the stomata on their leaves. Foliar fertilizers can be applied more frequently than soil fertilizer.

The frequency is dependent upon the plant type(s) that you are growing:
  • Annuals every 3 weeks
  • Fruit every 3 to 4 weeks
  • Perennials every 6 to 8 weeks
  • Vegetables every 1 to 2 weeks during the growing season

See our Foliar Feeding Guide for more info and tips from Dr. Buglady on our website.

See our wide variety of Foliar Fertilizers here.

Thursday, April 19, 2012

YUCK - What is that in my flour?

Indian Meal Moth - Pantry Pests
Adult Indian Meal Moth
More than likely that gross bug in the flour (or cereal, dried fruit, spice jar, or whole grain) is the larvae of an Indian Meal Moth Plodia interpunctella. The Indian Meal Moth is by far the most common moth that infests food products. This guy is going to show up because it infests food at the market, dried pet food, and even birdseed. While it’s almost inevitable that this pest will find its way into your pantry, there are ways to contain the problem.

Revenge Moth TrapsFirst we can use the moth's own natural instincts against them. When the female is ready to breed, they emit a sex pheromone that is only discernible to the male. These pheromones are synthesized and embedded in lures that we can use at home to attract the male moths. The moth traps have a sticky, non-toxic substance and when the moths fly to the lure – they are caught in the trap. By isolating the males, the reproductive cycle is broken.

The other safe method for eliminating larvae and adult moths is to use food grade Diatomaceous Earth (DE). Food grade Diatomaceous Earth can be placed on top of grains and rice while stored; it can be ‘puffed’ into the corners and along the edges of your kitchen cabinets. DE is an odorless, non-toxic white powder that consists of finely ground fossilized shells. The powder is abrasive to the small cells of an insect and the sharp edges lethally cut through their exoskeleton.

I’ve been using the traps for a long time now and have not had any infestations in our pantry. They are the kind of workers that we all want – silent, ever-vigilant, effective, and inexpensive.

See these and other natural pest control products on our website. Pantry Pests

Thursday, April 5, 2012

The Magic of Corn Gluten

Corn Gluten pre-emergent herbicideMother Nature is amazing and corn gluten is one of her better gifts to gardeners! Corn gluten is nature’s weed and feed product. It’s easy to apply and doesn’t have the potential harmful side effects of a chemical. A natural by-product of processed corn, corn gluten is completely harmless to humans, pets, livestock and wildlife.  It is very interesting to note that corn gluten will not harm plants that are established (rooted with true leaves). 

So how can corn gluten help in the garden? Glad you asked…

Corn gluten can be used as a natural pre-emergent – to suppress weeds. Specifically, corn gluten inhibits the seed from germinating by drying it out as it cracks open to sprout. This action stops the development of roots – stopping the growth of the weed.

While its primary use is to stop weeds, corn gluten also has a high nitrogen count: 9-0-0. This nitrogen acts as a fertilizer and helps to green up established plants and lawns. 
Here are some of the weeds that corn gluten effectively controls:

• Barnyard grass
• Bermuda grass
• Crabgrass
• Creeping bentgrass
• Curly Dock
• Dandelions
• Foxtail
• Lambsquarter
• Pigweed
• Plantains
• Purslane
• Redroot Bigweed
• Smart weed

Continued use of corn gluten will actually diminish weed populations from year to year.
Safe, effective and easy to use…what more could you want from a natural herbicide?
Take a look at Suståne Spring Weed & Feed on our website and discover the amazing benefits of corn gluten for yourself.

Tuesday, April 3, 2012

Enzyme Cleaners – Clean and Green


Is it wrong to love a cleaner? I have recently become fascinated with enzymatic cleaners and I like them so much that I have gotten rid of my old cleaners and plunged headlong into this brave new world.  Here are the signs that you may be a candidate for enzymatic cleaner bliss:
ü      You feel frustrated with expensive products that don’t really work.
ü      The room you’re cleaning smells worse than when you started.
ü      The chemicals have not only made your sink shine but also ate away the grout between your tiles.

I like being amazed, but I like the science even better.  How do enzymatic cleaners work?    Well it’s pretty straightforward.  The enzymes are proteins that catalyse (speed up) a chemical reaction.  An enzyme cleaner works by attaching to the stain, spot or other organic nastiness (pet urine comes to mind).  Once connected to the offending organic matter, the action begins and the enzyme begins to break down the material. 

Enzymes basically break organic material into its basic components which are then ‘recycled’ by the planet.  Stains are gone, odors are gone – and you are left with a clean and sweet smelling environment.  Best of all, enzyme cleaners are not harmful to humans, pets, or aquatic life.

Specific enzymes break down different families of organics:
  • Amylase enzymes break down starch-based stains.
  • Lipolase enzymes break down fat-based stains.
  • Protease enzymes break down protein based stains.
 Here is a short list of ways our staff has used this amazing product:

1.      Clean out slow or clogged drains – REALLY!
2.      Clean up pet stains – including urine and blood.
3.      Remove skunk odor from clothes and skin and fur.
4.      Remove soap scum and gunk from tubs, showers, and sinks.
5.      Mopping floors.
6.      Cleaning out kennels and stalls.
7.      Remove wine stains.
8.      Clean up and kill mold and mildew.
9.      Cleaning stainless steel appliances – inside and out.

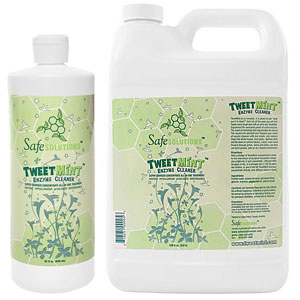
The enzymatic cleaner that we carry is Tweetmint by SafeSolutions.  I recently lent my bottle of Tweetmint to my college aged son and apparently it worked so well that I am not getting the bottle back.  We also offer EarthEnzymes Drain Opener. This product is specifically formulated to clear clogged drains without harsh chemicals.

Featured Post

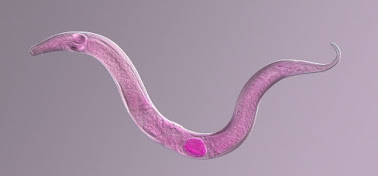
5 Cool Things About Nematodes

It’s September, and here at ARBICO, it’s Beneficial Nematode season. Every year we put our Beneficial Nematodes on sale at this time to enc...