Friday, May 4, 2018

Biorational Controls

No matter how we come to the place of making a change, our paths are lined with options.We have great freedom to pick and choose what works best for us. In my experience, working in the garden provides new opportunities for learning and decision-making every day. 

Over time, I’ve done an informal survey of my fellow organic gardeners asking them how they reached the idea that it was time to rethink our use of chemicals in our landscapes. Many came to the idea after a health scare or when a chemical they had used is suddenly labelled as carcinogenic. Some of us move to the organics gradually based on many reasons – for me it’s important to leave a smaller footprint both in what I take from the earth and what I leave behind. To do this, I try to move to increasingly sustainable methods of growing.  

One of the most important developments in sustainable agriculture are the biorational pest and disease control products that are being developed and are increasingly available to farmers and home gardeners. It’s a wonderful world of selective products that are relatively non-toxic to humans, animals and beneficial insects. The use of biorationals fits well within an IPM (integrated pest management) strategy in which a keystone principal is monitoring for and identifying the specific pest that is in the landscape.

Biorational Pesticides fall into 3 general categories:

1.  Botanicals are derived from plants. This category includes pyrethrins, azadiractin, neem oil, garlic and many others. 
2.  Microbial pesticides are formulated from beneficial micro-organisms or their by-products. This includes insecticides that are bacteria, fungi, nematodes and protozoa. One of the outstanding qualities of microbial pesticides is that they are very specific to the target pest and have little or no effect on other species. 
3.  Minerals are mined from the earth and processed minimally. Kaolin clay 
(Surround WP) and iron phosphate (Sluggo) are examples of this category of biorational. 

Biorational Disease Controls are typically botanically based or microbial. In the disease control world, most of the microbial biorationals are bacteria or fungi. 

Each of these categories, and indeed each biorational, deserves their moment in the sun. Stay tuned because we will be delving into many of the biorational control options in future posts.  In the meanwhile, we would love to hear from you if you have questions about biorationals or a comment about one that has worked for you.

Monday, April 30, 2018

Mosquitos Can Breed in a Bottle Cap of Water


It doesn’t take much stagnant water for mosquitos to find a place in which to colonize and reproduce. The new scientific measure of how much is enough is a mere bottle cap of water. It’s tough to spot this small amount of water and we hear all the time, “I have mosquitos but not stagnant water”. If you have a problem with mosquitoes don’t dismiss any amount of standing water or mud and be vigilant in monitoring drainage in your garden and lawns. 

    · The saucers beneath your container plants.
    · Plant soil and basins where the water isn’t draining.
    · Any solid, open container where rainwater or overhead  
      watering collects. 
    · Depressions in lawn and garden areas where the water moves to 
      but doesn’t drain well. 
    · Bird baths.
    · Improperly maintained or ‘empty’ pools.
    · Eaves, rain gutters and drains around the house.
    · Empty tires, wheelbarrows.
    · The edges of a pond.
    · Dense brush and weedy areas that provide refuge during warm 
      days.

If you have any of these locations, the optimal approach is to keep them clean and clear of debris and make sure that anything catching water has a clear path to quick drainage. Not only do mosquitos need very little water to reproduce in, they don’t need much time. Mosquitoes breed about 28 hours after the adult emerges. Here is their life cycle:
  1. Female adults find a blood meal and lay eggs on or near water. This includes soil areas that are wet. Her eggs can survive dry for months. 
  2. Eggs hatch when exposed to water. Hatching speed depends upon the water temperature and type of mosquito. 
  3. Larvae live in the water, molt several times and need to surface for air now and again.
  4. Pupae do not feed. Adults emerge from this stage after about 2 days to 1 week. 
  5. The adult emerges. The females can live over a month and they require a blood meal to reproduce. Think of all those babies. 

I’m not sure what their proper place is on the planet but, at their best, mosquitos are an annoyance and at worst they are a health hazard. So, how do we control them organically? Options are varied and inexpensive – but one use may not be enough, so be prepared for repeating the process.
For any areas that are very moist to wet, consider applications of granular Bti, Bacillus thurengiensis israelensis. This bacillus has been used for more than 40 years and there is great confidence in the scientific community that mosquitoes will not develop resistance to Bti. 
Bit only affects the larval stage of certain Dipterans – which include pests such as mosquitoes, fungus gnats, and black flies .  The Bti works because of the pH of the mosquitoes' intestines.  In other good news, Bti cannot survive in the intestines of mammals, birds, or aquatic life. So, it is entirely safe to use when dogs (and other animals) are present. Bti is available in granules and dunks. 

For larger areas or if you anticipate repeat applications, try the larger sizes of granular Btipackaged as Aquabac. If you prefer liquid applications, try Aquabac Xt. Bonus on Aquabac products – they ship for free within the contiguous 48 states! All of the Bti products are safe to use around humans and other mammals, reptiles, amphibians and birds. They can easily be used in stock tanks and other drinking reservoirs for your animals – just beware they may eat them. While it won’t harm them, the dunks and granules don’t control mosquitoes once consumed by other animals. 
If you need a fast solution for your bar-b-que or outdoor shindig, try spraying the breeding areas and any area of the garden where mosquitoes are swarming with Mosquito Barrier or Garlic Barrier - a garlic based liquid that smothers adult and larval stages of the mosquito rapidly. The smell of garlic dissipates quickly but continues to repel mosquitoes for some time. A bonus with Mosquito Barrier or Garlic Barrier is that they also repel ticks, gnats and fleas AND you don’t need to know exactly where the bugs are in order to gain control!  
If the thought of spraying a garlic solution in the garden or on the lawn is too much for you, try Mosquito Magician. Mosquito Magician is a botanical concentrate that acts as a smotherant for the larvae and a contact kill for the adults. It repels for up to 2 weeks. The botanical combination includes: citronella, cedar, lemongrass, garlic, geraniol and rosemary oils.
There is a new bacillus in town that is selective to killing mosquitoes only. Bacillus sphaericus, Serotype H5a5b, strain 2362 is highly selective and kills only mosquitoes. Packaged under the trade name, Spheratax SPH, it is a water soluble powder that is safe to use by or in contact with mammals – humans, dogs, cats, horses, livestock, wildlife – as well as around birds, reptiles, and amphibians.
If you are interested in learning about more organic and natural ways to control and repel mosquitoes, follow this link to a comprehensive list of the products we offer: Mosquito Control. If you have questions, please feel free to contact Dr. Buglady– she’s happy to answer any questions you might have!


Wednesday, January 24, 2018

Learn Garden Safety Without Losing Your Mind

Happy Gardener Safety Tips

Statistically we are more likely to have an accident with injury in and around our home than anywhere else on the planet. While accidents in the living room leads the list, the garden is not far behind. It’s a serious enough health issue that the CDC actually has a web page devoted to Gardening Health and Safety Tips.

We understand the benefits of gardening as we age – exercise, vitamin D, sensory stimulation and problem solving to keep that brain ‘plastic’ are just a few of those benefits. But, it’s important to realize that making sure we think about safety in new ways is part of every session in the garden. Protecting ourselves begins before we open the door to go outside. It’s important to do the basics: wear sturdy shoes, eye coverings, a wide-brimmed hat, gloves, and perhaps most importantly – use a UVA/UVB sunscreen that is SPF 15 or higher. As we age, we absorb vitamin D at a slower rate, so some doctors recommend 15 minutes of sunlight before putting the sunscreen on. But, check with your doctor before you actually do this!

Limits – a word that rankled us as teens and now annoys us as our bodies change. It is important to know our limits; this is true on cold days as well as hot days. According to the CDC, here are some aspects to be watchful of:

  • Warm up before doing anything strenuous – pulling weeds is excellent for this.
  • Drink water and avoid alcohol and sugar. Make sure you drink before you are thirsty. 
  • Take breaks often. As for me, I have scattered chairs and other seating options throughout the garden. Some days, much of my gardening takes place from a chair and I scoot it around with me. 
  • Eat! It’s all too easy to get caught up in getting things done; just don’t forget to fuel the engine.
  • If you are ‘feeling the heat’, get inside with a wet compress, water and if you are dizzy, have a rapid pulse, getting confused, or nauseous it is time to call for help. 
  • Avoid prolonged repetitive motion. 
  • Make sure your tetanus shot is up to date. Clean any open wounds or cuts with isopropyl alcohol or hydrogen peroxide. 

Buy OMRI Listed Products For Your Organic Garden!


Lawn & Garden Care
Where would we be without out tools? It’s important that we treat them as valued allies in the garden. A dull or poorly maintained tool is a dangerous tool. Perhaps one of our best new tools in the garden is our mobile phone. Carry it in a closed pocket or elsewhere on your person but keep it near you just in case something goes awry.

  • Sharpen tools carefully and keep them sharp with a portable honing stone.
  • Keep the moving parts on tools well lubricated and clean.
  • Use the right tool for the job – understand the limits of the tool you are using. 
  • Paint dull tool handles a bright color so you can spot them easily. 
  • Place tools carefully when not in use. Make sure they are not a tripping hazard. Always place blades and tines face down and standing. Cutting tools need to be closed and locked if they are not in use.
  • Ladders should be in good working condition with all 4 points in contact with the ground. Have a spotter and don’t climb the ladder when you are alone.  
  • Unplug electrical power tools when not in use. Remember that electricity and water don’t mix.
  • Keep an eye out for hazards. Consider handrails placed strategically and make sure you have them for all steps and stairways. 

Use care with chemicals – follow manufacturer’s directions for storage, mixing and use. Remember your basic chemistry: add the ingredients into water if diluting, not the other way around. Wear safety goggles or other eye protection.

Gardening is a joy and rewards us with fresh food, flowers, amazing smells and sights. Stay safe and make sure that you treat yourself as well as you treat your garden!

Tuesday, November 14, 2017

Great Soil is the First (and Best) Method for Fighting Weeds

Weed Control Begins With Soil Preparation
When I was just discovering my passion for gardening, one of my neighbors, an experienced gardener, gave me the best soil tutorial. On one of her walks, she noticed as I struggled to deal with weeds in my drought stricken yard. She stopped to chat and casually mentioned that I really needed to work on the tilth of my soil. When I asked what that meant, she kindly invited me to check out her garden – it would be better to see and feel what she meant.

When she poured some of her soil in my hand it was clear that what I saw, felt, and smelled was very different from the dirt that I was dealing with.  I had an immediate and visceral reaction to the wonderful musky richness.  The soil was soft and darkly colored and it felt good – plump, moist, lively – not thin, grainy and dry like the stuff I was dealing with. She told me that this was my goal in the garden - create soil that was dark brownish-black and smelled good, clean and earthy and held together but did not clump or fall through my fingers when moist.

Avoid weed problems the easy way. Build living soil with high nutrient content today!


How to accomplish this? Her message was simple – back off the chemical fertilizers, feed the soil by adding organic matter and she promised that over time my soil would become like hers and I would have no weeds. Really? No weeds??? I was a skeptic at first but over time I have learned that if I cultivate healthy soil and I make sure to water and fertilize properly* – weeds are unlikely to grow in such a healthy soil environment.

Organic Mulch Helps Build Healthy Soil
Adding organic mulch
can prevent weeds.
In the ensuing decades (yes decades), I've learned that most of us don't inherit or buy a piece of land with great soil, the fact of the matter is that we need to improve the soil with every growing season.  Our best friend in the garden is soil that is rich in micro-nutrients, has enough macro-nutrients to support what we are growing, and has abundant microbial life.  Good soil encourages:

• The breakdown of organic matter.
• Microbial life that develops good soil structure.
• Fights pathogens that would harm plants.
• Transforms minerals so they can be better used by plants.

It's not that I never have any weeds, but the weeds I do have are easy to manage. Another great lesson learned from a fellow gardener – pull weeds in the first 15 minutes you are in the garden and that bend and snap helps warm-up your muscles and joints in preparation for the tough gardening ahead. Smart advice to help avoid an aching back!

*Watering and fertilizing properly are dependent upon many factors – soil, temperature, humidity, wind, and the type and health of the plants you grow. It is important to know how all of these factors influence your garden's needs. Responding appropriately is a lot easier with knowledge. Just remember "The Three Bears" – not too much, not too little, just the right amount of water and fertilizer are very good things!

Wednesday, October 9, 2013

Scouting for Insects: Save Money, Time and Your Sanity in the Greenhouse and Garden

Let’s face it, greenhouses provide the perfect environment for breeding pest insects.  But unfortunately, by the time we see pest related damage on plants, the infestation may be well on the way to careening out of control. 

One way to save money, time and ultimately your sanity in the greenhouse – or garden is to use simple and affordable sticky traps to trap and monitor for pest insects. 

Using sticky traps will help you grow better in several ways.  Use them to:

  • Identify specific insect and mite problems - before plant damage occurs.
  • Locate where the problems are occurring.
  • Observe changes in the severity of infestation - this information will help you make the decision of whether to intervene or not.
  • When interventions are necessary, having the pest identity will help you treat exactly the problem you have. Ultimately this will save you money and time spent on unnecessary purchases.
  • Use the trapped insects to identify the phase of the pests life cycle that you are confronting.


How do sticky traps work?


Sticky traps can either use a pheromone attractant, a smell attractant or a color attractant.  The color attractants attract an assortment of pest insects while the pheromone and smell attractants attract specific insects.  Today, we’re looking at the sticky traps that use color as an attractant and they are excellent for trapping:
  • Aphids
  • Fungus gnats
  • Leafminer flies
  • Shore flies
  • Thrips
  • Whiteflies
  • Plus many others

The color of the sticky trap attracts pest insects, once the insects land on the trap they struggle and become trapped by the sticky adhesive.   Use a loupe or hand lens at least 5X magnification to take a close look at what gets trapped.  Any magnification above 5x should allow you to identify the pest(s) on the trap.  I use a 30X loupe and I can see excellent detail of the microscopic world.  One of the great side benefits trapping the pest on the sticky board – when you don’t recognize what is on the trap, place the trap in a plastic bag and take it to your local county extension office or to a fellow grower for help with identification.

For traps to provide you with the most complete information, divide the greenhouse into logical units.  Set traps throughout and around the perimeter.  Make sure to place traps near openings and ventilation systems – these are likely spots for pests to enter the greenhouse.  Setting some traps just outside any openings will help with very early detection.

We recommend using 3 to 4 of the 3”x5” traps for every 1,000 square feet.  Place some near doors, vents and in plant species and varieties that are highly susceptible to pest insects.

Monitor the traps daily and keep a record of what you find.  You can use this data to identify the pest, determine the level of infestation, progress of the life cycle.  All of this data is helpful to determining when and if you need to intervene.  Change out the traps when the sticky substance is covered with insects, dust, or grime.

On a personal note, the traps are sticky to us as well.  If you get any of the sticky substance on your hands, simply remove it using either a waterless hand cleaner or a little vegetable oil.

Thursday, June 27, 2013

Grasshoppers - Legends of Greatness & Evil


Legends of greatness and evil abound in the west.  When it comes to the 6-legged westerners there is no more storied creature than the grasshopper.  The stories of their swarms are epic and biblical – skies dark as night and crops devastated in moments.  The Hopi tell their children that the grasshopper will bite off the noses of those who disobey elders or violate taboos.  Other tribes claim that the grasshopper predicts bad weather or brings evil with it.  Even Aesop featured the grasshopper in his fable of the Grasshopper and the Ant – using the grasshopper as counterpoint to the industrious and hardworking ant.  Needless to say, the grasshopper doesn’t survive the harsh winter because of his summertime idleness and folly.

Grasshoppers present an obstacle for those of us who were taught to look for the best in every situation.  I’ve always felt that there isn’t much good that can be said about grasshoppers, but I’ve become curious about where they fit in the scheme of things and whether I need to change my attitude. 

It turns out there are more than 400 known species of grasshoppers in 17 states of the western U.S.  Only 2 dozen of these species are considered a pest.  Several species are considered as beneficial insects because they consume undesirable plants. The other grasshoppers are somewhat benign. 
Even the ‘bad guys’ have some good points:
  • As an herbivore, grasshoppers link plants to the rest of the ecosystem and his helps biodiversity.
  • Their droppings (frass) contribute nutrients by turning the plant material into fertilizer.
  • They are a food source for birds, spiders, lizards, and rodents.

However, as with all things in the garden, I’m looking for balance.  I think that there is enough vegetation to go around.  But I want those bad guys to exist outside my gardening perimeter.  I realize now that before I try to manage the grasshoppers in my patch, I need to identify what species I’ve got and determine whether they are actually harmful to my cultivated plants.  One excellent clearinghouse of identification guides is provided by the USDA and can be found at this link: Grasshopper Identification Tools. 

A little about their life cycles
Understanding the life cycle of a grasshopper can help you identify the species you have and to determine when treatments will be most effective.  Taking this step can save time and money.  Typically, grasshoppers emerge in late spring and remain active through autumn.  Treatment at any time will help, but to gain optimal control it is important to watch for them in their earliest, above soil stages. 

All grasshoppers begin life as an egg.  The eggs are laid in soil, in tight clustered pods and are usually well hidden in specific habitats.  The eggs begin to incubate immediately.  Depending upon the species, the embryos begin to develop and then based on environmental cues (temperature is a major cue) enter a state of diapause and cease growing until favorable incubation temperatures are reached.  Both the diapause and incubation inducing temperatures differ from species to species.

Generally temperatures between 50 oF and 55oF trigger development to restart.  Once optimal temperatures are reached grasshoppers continue to incubate in soil and will hatch as nymphs.  All grasshoppers develop through a process of gradual (simple) metamorphosis, there is no larval stage.  The hatched nymph looks like the adult except it is smaller, has no wings, fewer antennae segments, and only rudimentary genitalia.  Depending upon their species, as grasshoppers grow and develop they molt (shed) their outer skin 4 to 6 times during their nymphal (immature) life.

Control options
One way to keep grasshoppers away from the plants you don’t want them to consume is to provide some beneficial habitat in a place where you are happy for them to be.  An island of dense, native grasses and flowers is a great way to help keep them away from your more precious plants. 
When grasshopper populations exceed your tolerance, there are two natural and effective organic methods for controlling them. 
  • Nosema locustae - naturally occurring fungus that weakens and kills when eaten.
  • Beauveria bassiana - derived from naturally occurring fungi in the soil cause muscadine disease when consumed.
Nosema locustae is available under two labels:  Semaspore and NOLO Bait.  These products are effectively the same.  The Nosema locustae is embedded on flakes of bran that act as bait to the grasshopper.  Once consumed, the grasshopper develops a disease, is weakened, consumes less, and eventually dies.  In 2 – 4 weeks, 50% of the population will be dead.  It is most effective when grasshoppers are ½” – ¾” in size.  Nosema locustae is only fatal to grasshoppers and their close relatives such as crickets and mantids.


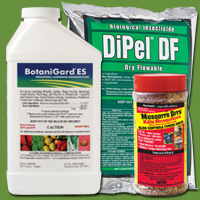
Beauveria bassiana is available as a liquid under two product names:  BioPhyter and Botanigard ES.  It is available as a wettable powder as Botanigard 22WP.  This product causes white muscardine disease in a wide variety of pest insects including thrips, aphids, whitefly, psyllids, and fire ants.

When either of these products are applied, pay close attention to grassy areas of untilled ground, to southern slopes or any other location known as a grasshopper hatching bed.

While grasshoppers may be considered a scourge, they have some interesting and quirky behaviors.  I’d like to leave you with a few of these so you might see why they are quite fascinating:
  • Females lay eggs in holes that they dig with their abdomen.
  • Some grasshoppers spit a bitter, brown liquid as a defensive behavior - they may spit at you when you handle them.
  • Before molting, grasshoppers do not eat.
  • During molting, they swallow air to build pressure to break the cuticle of the old 'skin'.
  • Each grasshopper species has an individual song produced by rubbing or flicking the lower back legs on their forewings.
  • Some species have elaborate courtship routines performed by the males. Some include posing using wings and legs while others wave brilliantly colored wings to woo their mate.

In spite of their bad reputation, I can’t help but feel respect and some admiration for an insect that has achieved fame in so many cultures and breeds such fear and loathing in the hearts of gardeners and farmers everywhere.   But when it comes down to the battle for my plants – I am happy that there are control methods that won’t harm the good guys in my garden.

Saturday, May 4, 2013

Birds, Butterflies, Bats, and Bees…oh my!!!


By the simple act of transferring pollen from one flower to another, one of the great miracles of the plant kingdom takes place and production of our food begins in earnest.  Without pollinators, we don’t have food crops.  Something like 1 in 3 bites of food we eat are a direct result of pollinators doing their job.

The relationship between pollinators and plants is critical to healthy cultivated and wild plant communities.  But we are facing some critical problems that are negatively affecting pollinator populations.  The loss of habitat, the increased use of pesticides and other chemicals, combined with unexplained diseases have imperilled these relationships.

This is alarming news about what is happening to the pollinators.  Even scientists don’t completely understand or agree about what is happening to pollinators.  This can be daunting because it’s hard to determine a best course of action and what we can do individually and collectively to make positive change.

There are some daily and long-term decisions we can each make that will help to reverse the course of pollinator decline.  So, what are some simple things we can all do to help pollinators survive?  Here is what I’ve learned recently that we can do as a start…

Protect the pollinators from toxins.  Every day we release pesticides and chemicals that poison or impair the breeding cycles of our pollinators.  Become aware of the species native to your area and what needs to be done to insure their continued success.
  • Read labels before you buy and spray - make sure that you minimize the impact on your local pollinators.
  • Buy organic foods - support farmers who are not using pesticides and chemicals.
Mason Bee Lodge
Build habitat for native pollinators.  Loss of habitat is one of the great dangers confronting pollinator populations.  Pollinators need undisturbed habitat for nesting, roosting, and foraging.  An important part of building habitat is to plant native trees, shrubs, fruits, vegetables, and ornamentals.  Contact your local native plant society or the master gardeners in your area – they have lists of native plants that attract and support pollinators.
  • Plant native in your garden.
  • Focus on including nectar and host plants in your gardens.
  • Work within your community to create large, uninterrupted areas of plant populations in which pollinators can live and work.
  • Add a mason bee house or bumblebee habitat to your garden - these are natures gentle pollinators.
It doesn’t seem like much, but if we all take one idea and turn it into action we will make a difference. 


Featured Post

5 Cool Things About Nematodes

It’s September, and here at ARBICO, it’s Beneficial Nematode season. Every year we put our Beneficial Nematodes on sale at this time to enc...